Spring Bees / Swarms
I managed to get the nucs installed into their nice new hives in the “bee corral” and my second attempt at beekeeping was proceeding exactly according to plan.
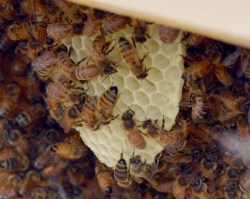
Sidebar: My 9 year old next door neighbor has expressed an interest in bees multiple times, so we had ready an appropriately sized jacket/hood combination in hopes of helping him develop that interest when the hives were up and buzzing. He was excited and ready to join me for the first hive inspection @ 7 days. I’ll attest that 9 year old eyeballs are nice to have available when the objective is to confirm the queen in each hive; he spotted the queen on the frame below and pointed her out to me (by the time the picture was taken the shy queen had scooted over the top to the other side of the frame).
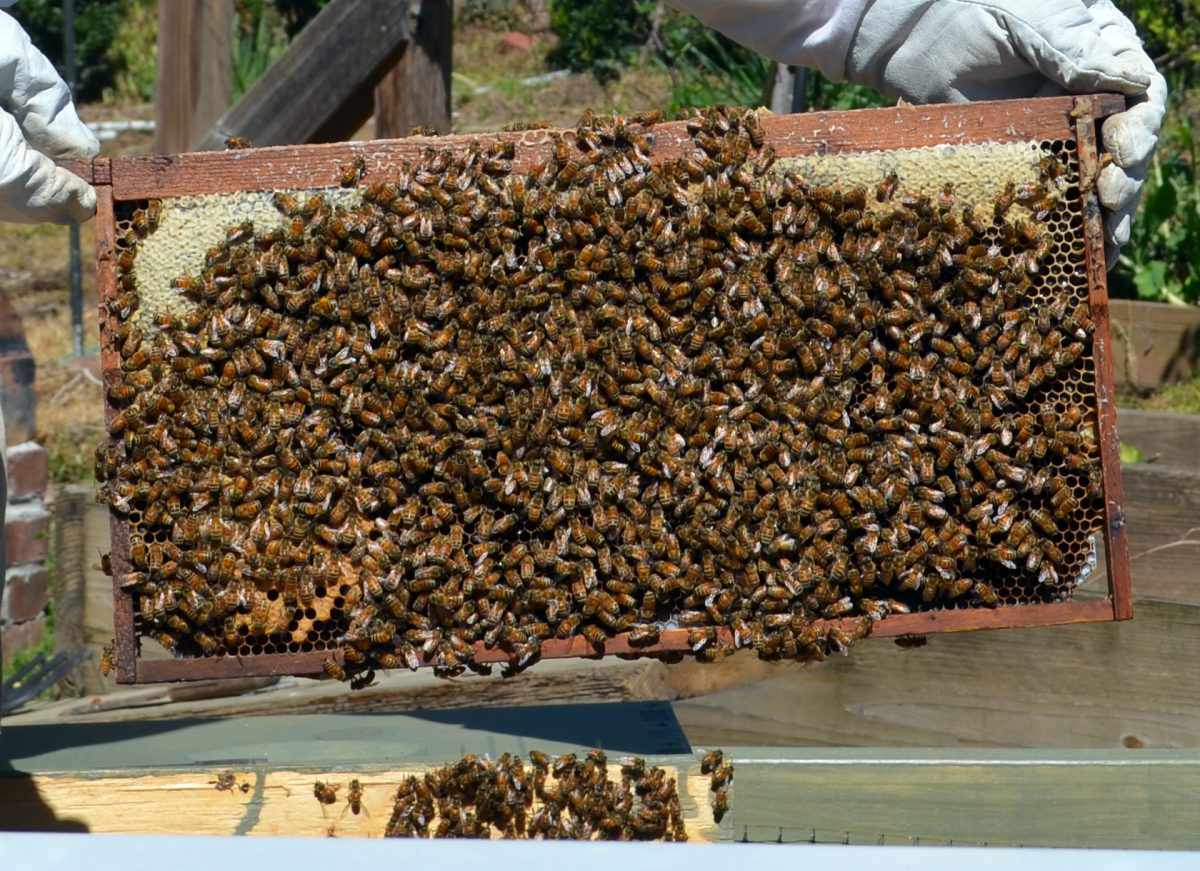
A healthy frame of brood
All. Proceeding. Exactly. According. To. Plan.
Right….
I should know better- a colony of bees is a complex super-organism, “nature” in its purest form and pretty much immune to any human’s attempts at control. I was reminded of this a few days later when I came home one evening to discover a swarm of bees hanging on a hose nozzle I had draped onto a willow branch (to aerate and top off the amphibian pond below).
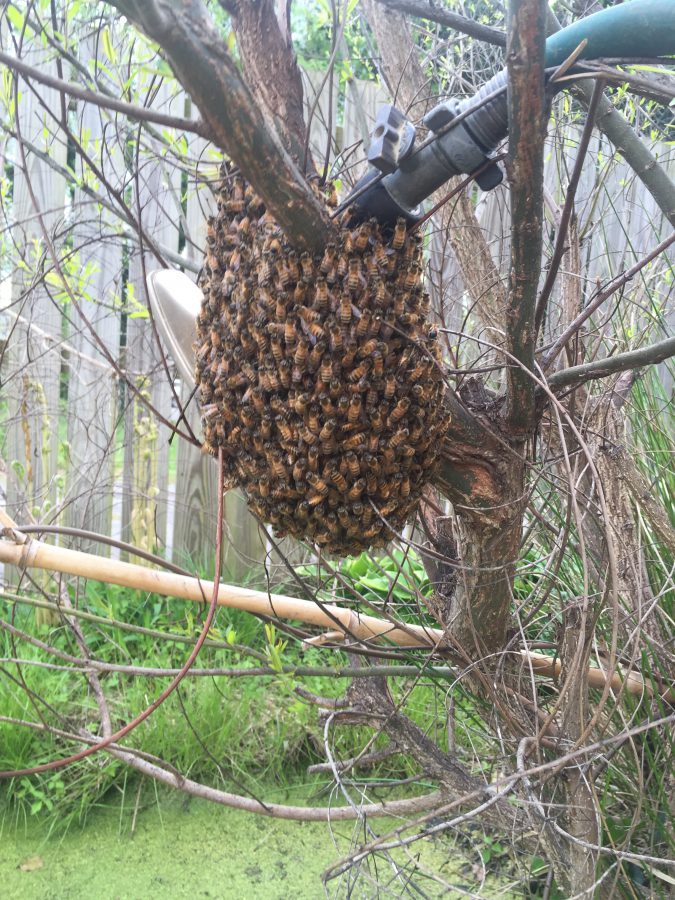
Spring swarm #1
When bees swarm they are splitting the colony; this is the way bees naturally reproduce in the spring and summer (think reproduction at the level of the super-organism, the colony, and not at the level of individual insects.) The queen leaves and a good portion of the workers follow; usually they settle and surround the queen in a clump nearby while scouts go off in search of a good place for the new colony to settle and build out a hive. (Note: the bees left behind are already well on their way to raising a replacement queen, so eventually it rebounds.) Usually it is only a matter of hours before the swarm is led by one of the scout bees to their new “home”, so I didn’t want to fool around and loose 1/4 of my bees two weeks into it. Fortunately, a swarm is the most docile collection of bees one will ever see and can be collected easily without fear of a massive stinging attack (I had read this in multiple sources but my first test still made me extremely nervous).
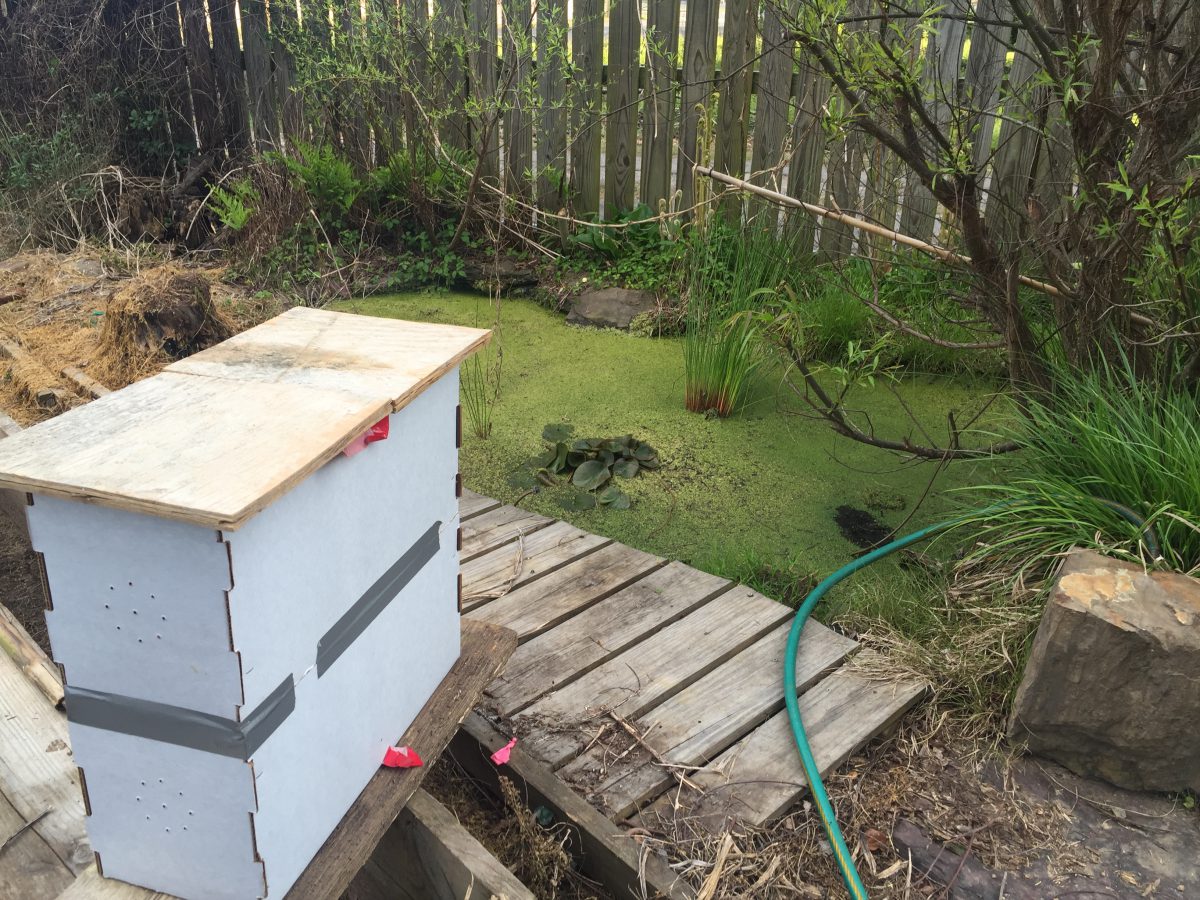
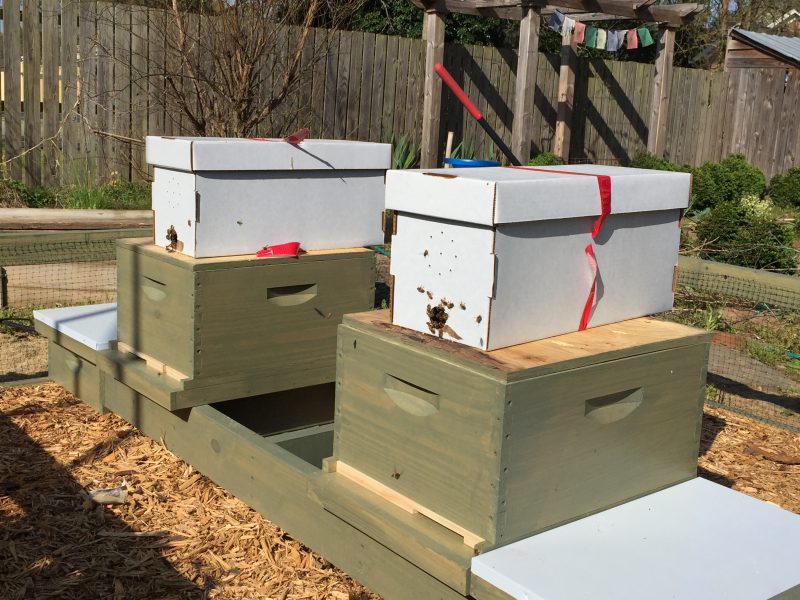
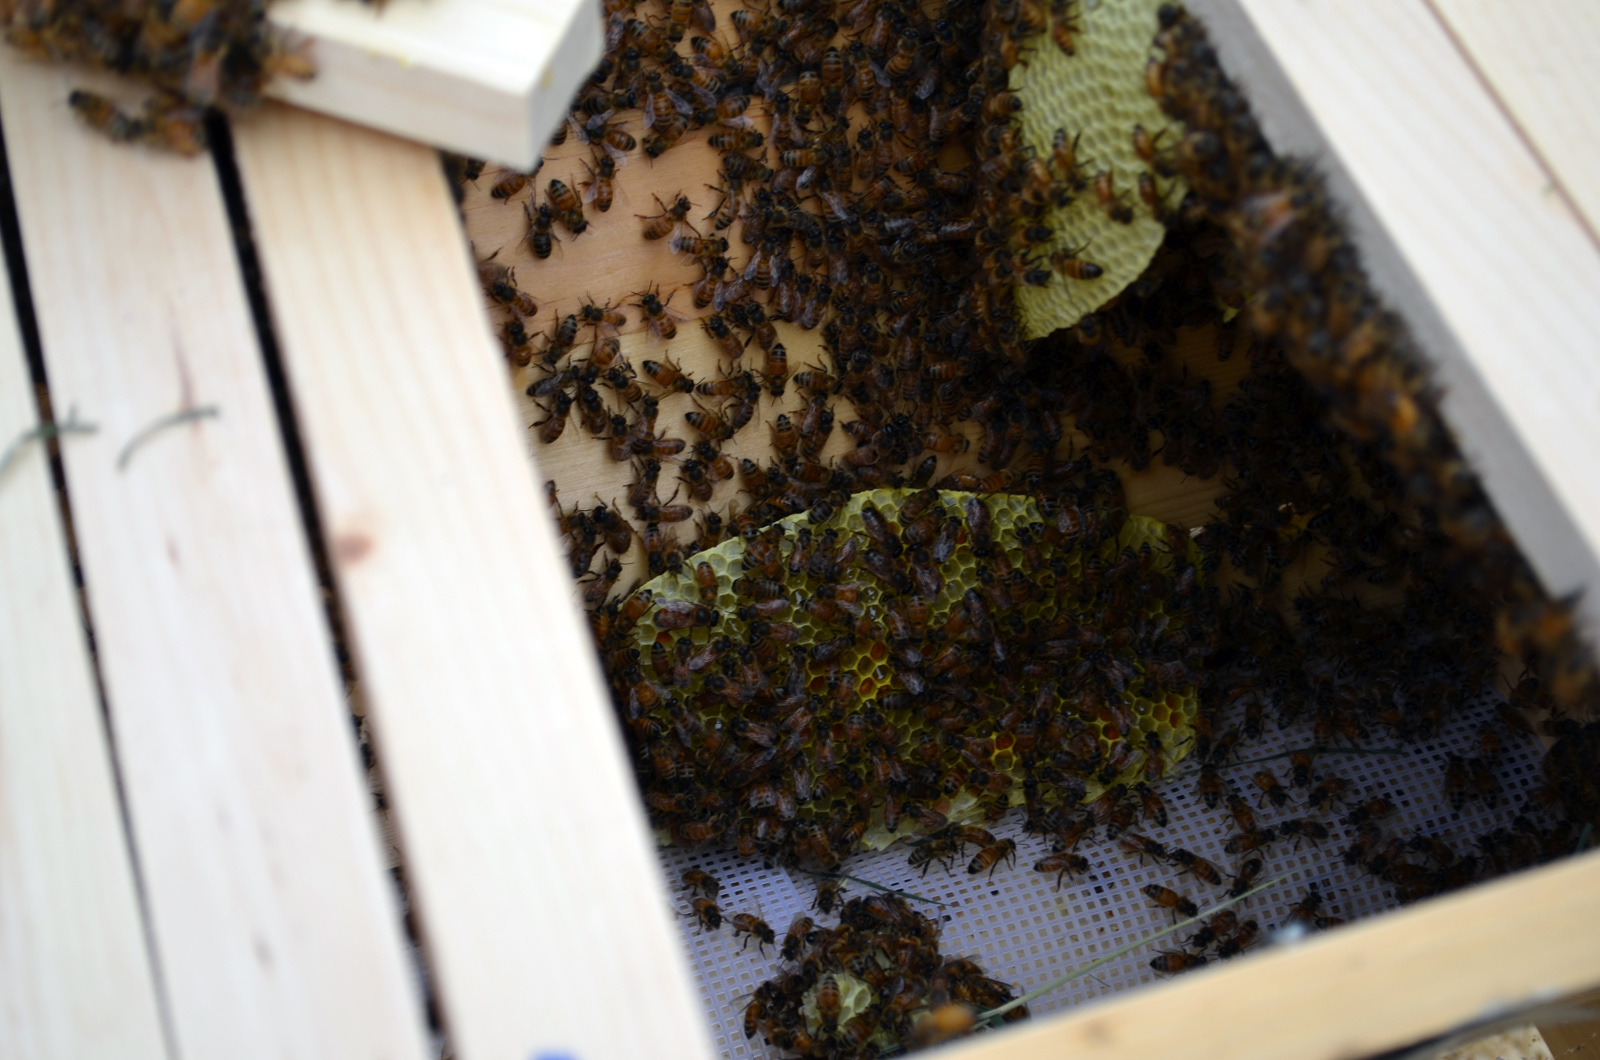
Temporary swarm hive box
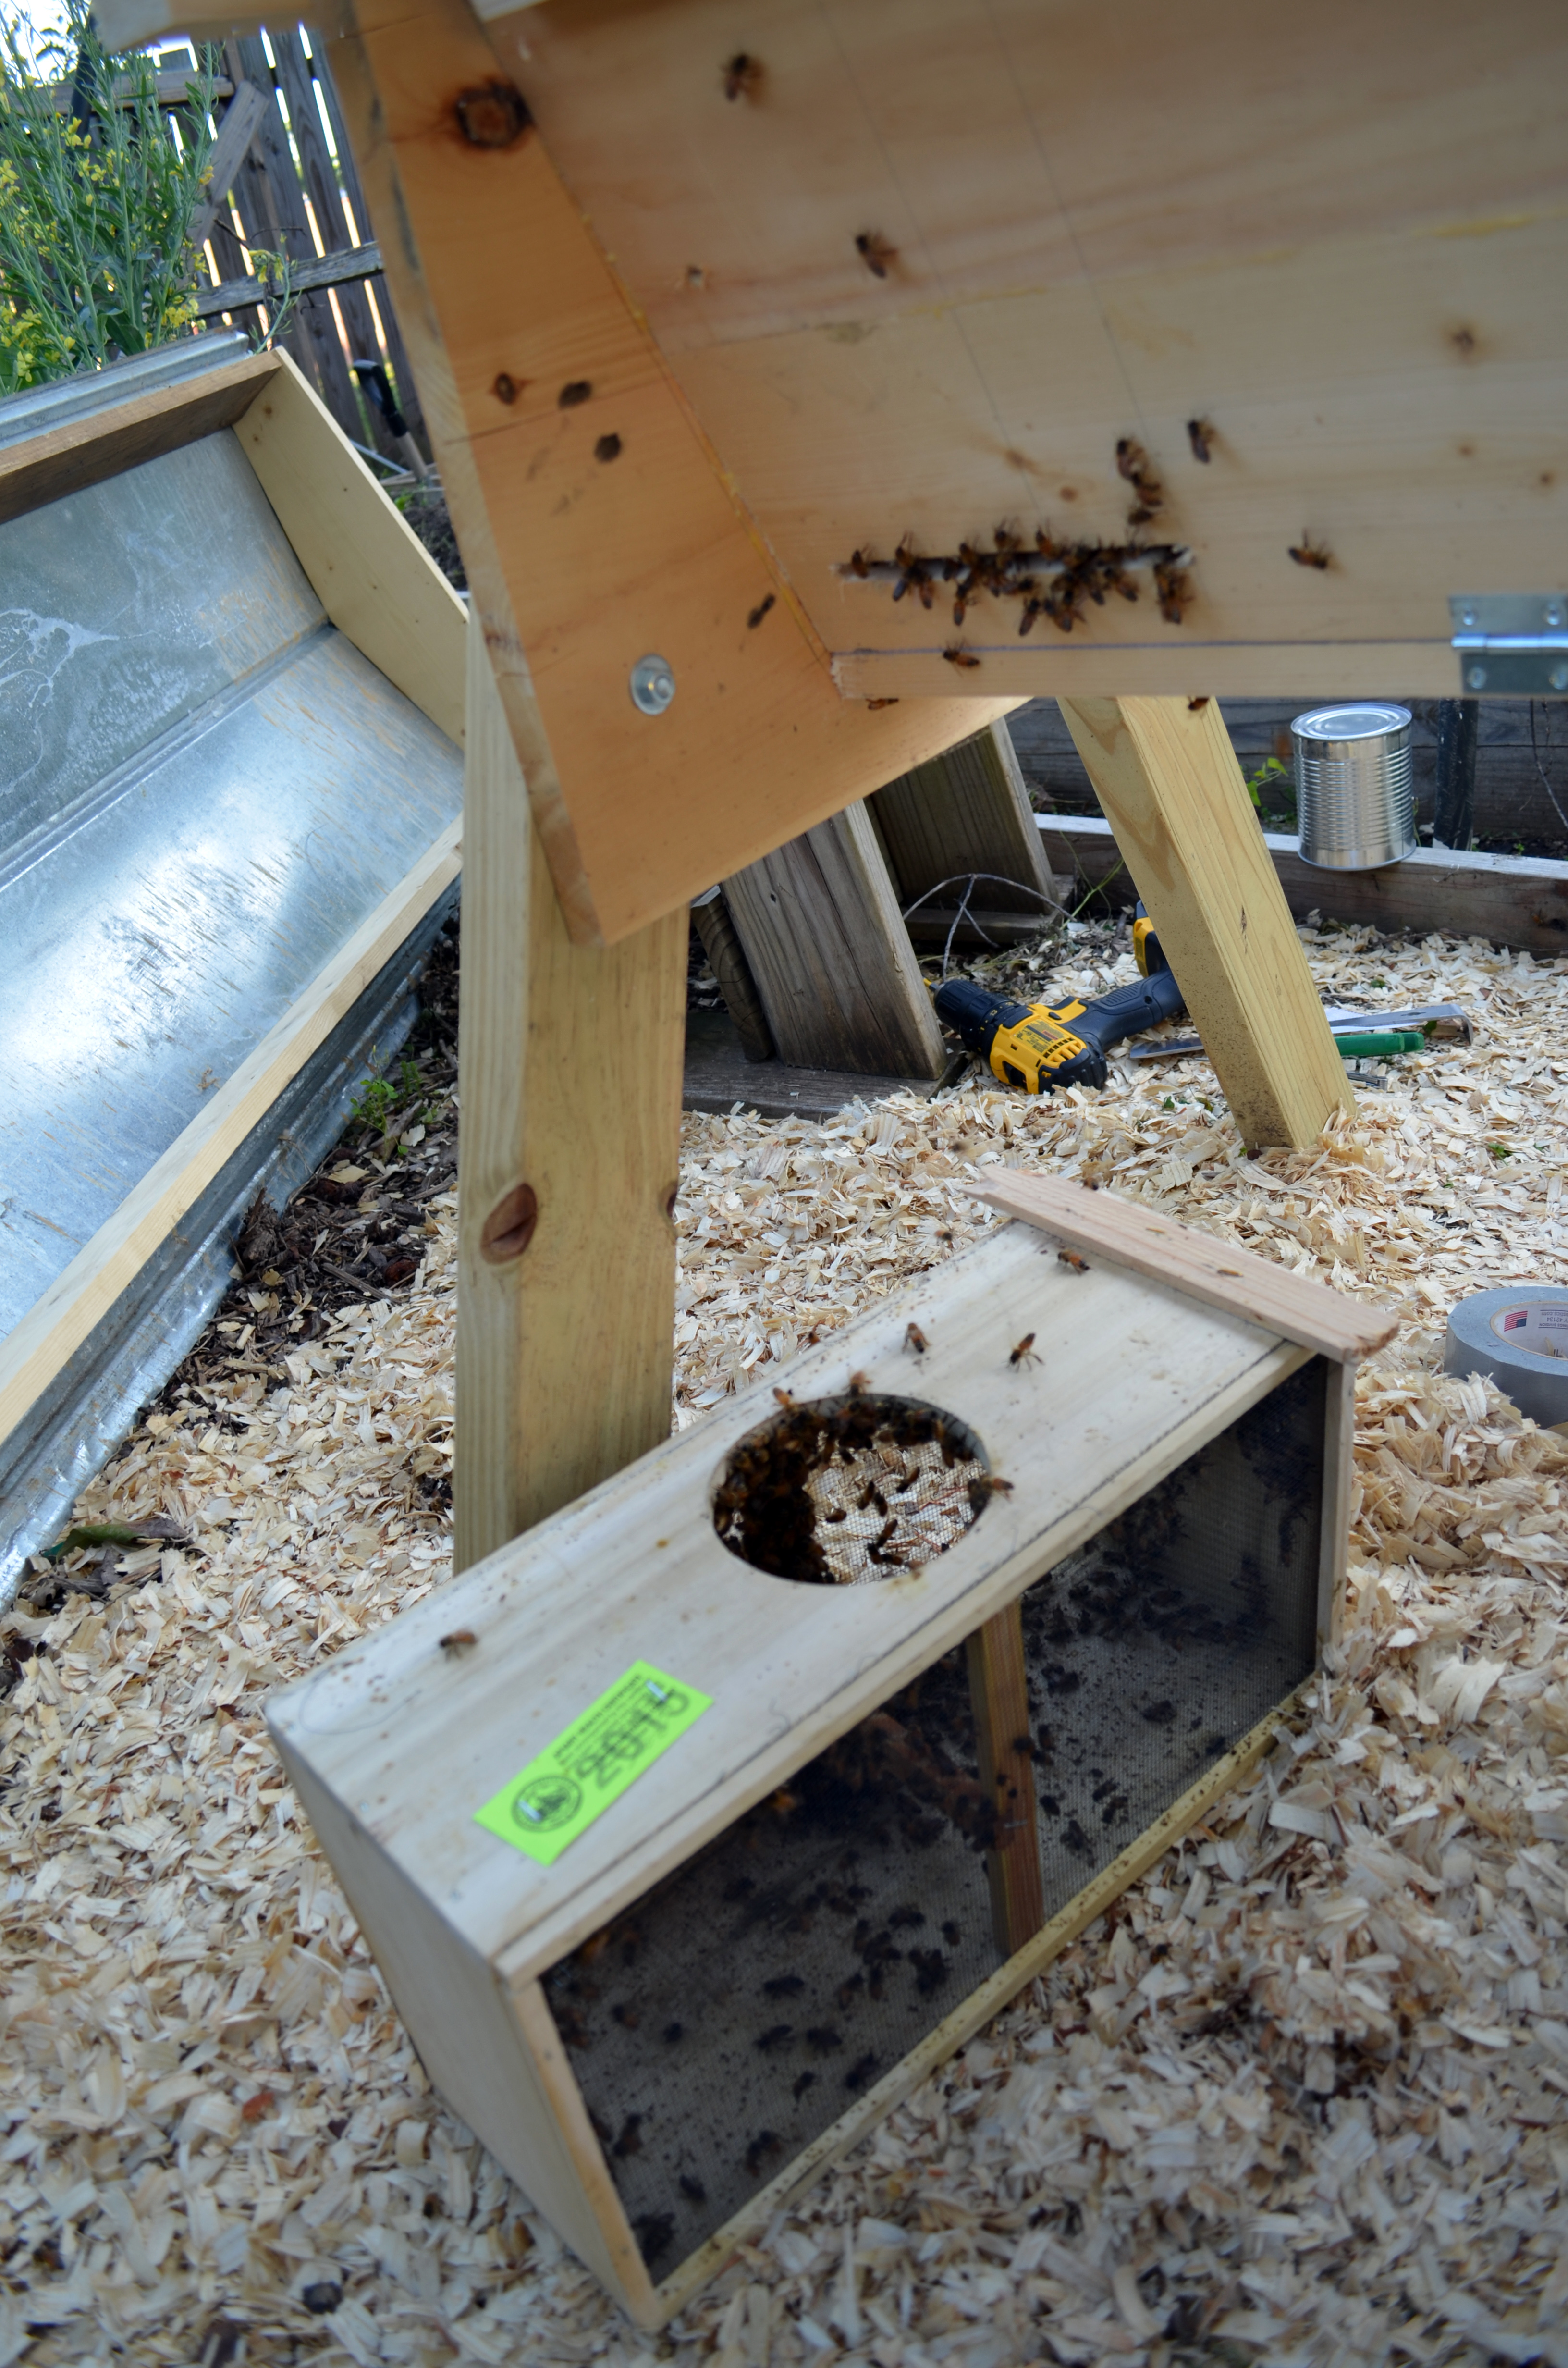
I retrieved the cardboard nuc boxes and successfully whacked the branch while holding the box underneath to shake the bees off of the willow and nozzle, then added frames and set up a feeder inside. I had to order or make a bottom board before I could put them into a permanent wooden hive body. This was on a Thursday; I had to leave town for the weekend and when I returned Sunday I started building the required base. As I was almost finished with the first base, I looked up and discovered that a 2nd swarm was in process so I had to scramble and build a second crude base.

Spring swarm #2
The second swarm was under an iron chair against the back fence; I set up a hive box there and then shook them in. (Note to bees: next time please do not swarm to the underside of a cast iron chair; lifting the chair and shaking 5,000 of you off into a box was not a positively memorable experience for me.) The next morning they were still in the hive box and I could see they had started gathering pollen, so all was good. I had moved the first swarm into a permanent wooden hive body as well, so the swarm crisis was over and I now had four hives. Or so I thought…..
Stalling with Pictures
Apparently I’m still not in the full posting mode again, so here are some pictures while I work on a follow up “bee” post about swarms.

Color
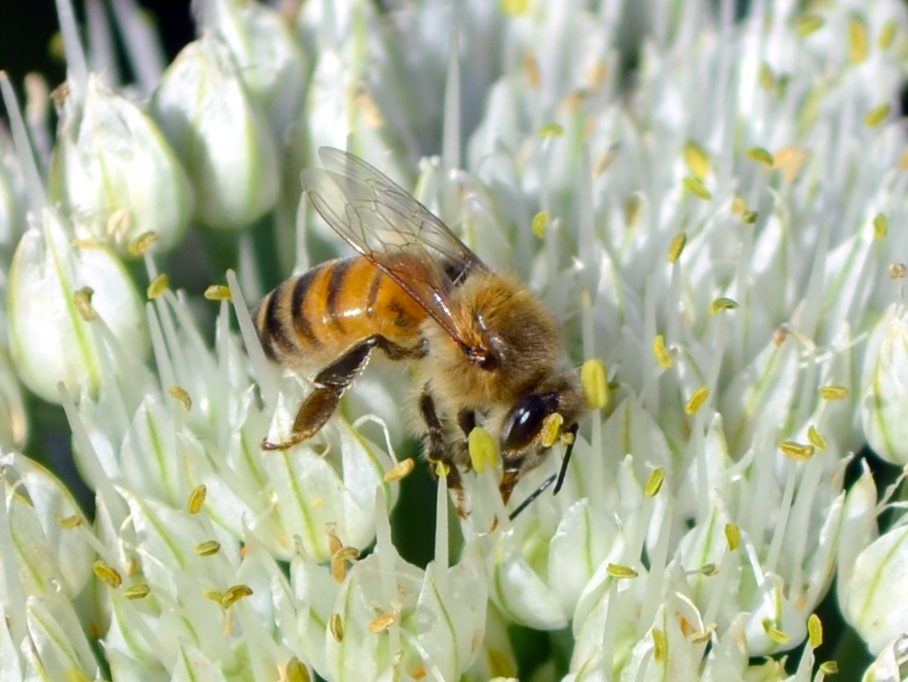
Fetching Onion Nectar

3 dimensions
Spring Bees, Chapter 2
Last spring I decided to add a bee hive to the mix and dove in head first.
I built a hive (a Kenyan top bar hive) and then installed a “package” of bees in April. The bees started off drawing crooked comb, and apparently I made it worse in my efforts to fix it. By late May I figured out that I had lost the queen (likely killed when comb detached from a top bar and smushed her); it was too late to do anything about it and the colony was doomed.
I’ve not had much failure when trying new things in the garden, and losing a colony of bees mostly due to my errors was quite discouraging. I wasn’t sure I’d try it again, ever.
By the end of last year I had decided to try again, but to do it in a more logical and “normal” way. I attended a seminar @ The Atlanta Botanical Garden in January and read everything I could. Also, I decided to go the “Langstroth” hive route (the traditional bee boxes with removable frames) since equipment and local experience/expertise were much more readily available. I reserved bees for late March pick up and the bee clock was officially ticking.
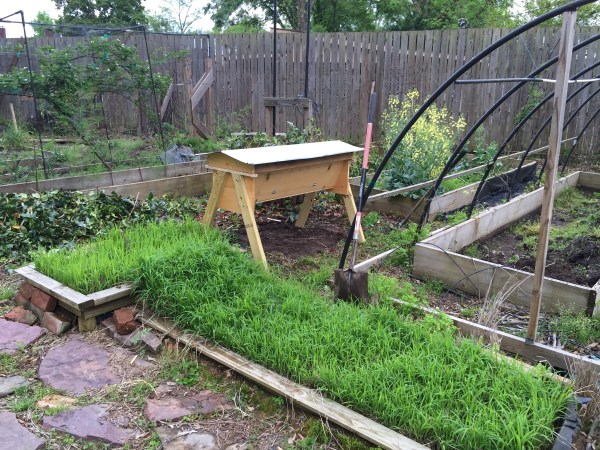
I had to decide where to place the hives in the yard and prepare the area to protect curious pets and provide a safe viewing area visiting neighborhood children. Up came the old rice paddy and the two giant beds (16×4) and soon I had a “bee corral” ready to go.
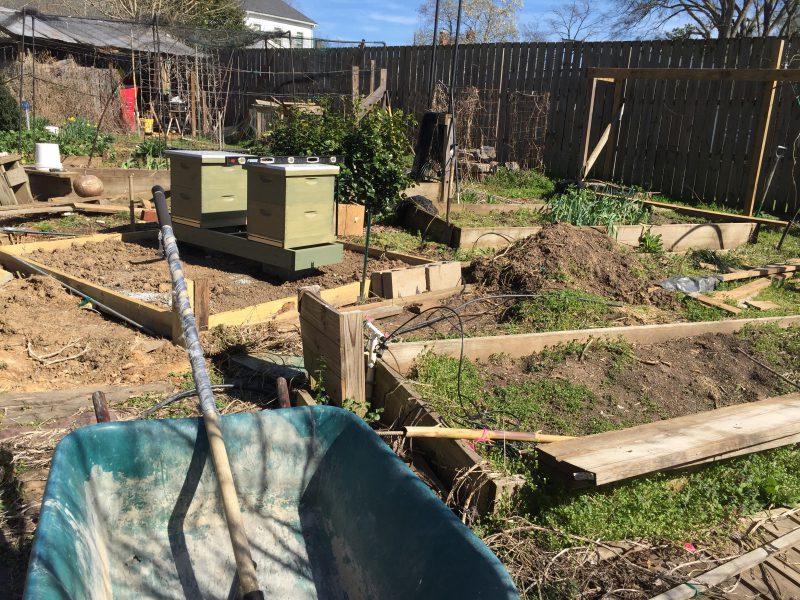
Mayhem, making room for bees
Salvaged carpet ground cover/ beetle barrier
I picked up two “nuc” starter hives in late March and installed them in my newly constructed bee corral (I mulched over the carpet of course, and netting is suspended below rails to keep small dogs from getting too close.)
I wasn’t pleased with what I got (3 frames vs the 5 frames pictured on the web page of the place where I purchased them) but I was stuck and tried to make the best of things. Note: I decided on the advice of several seasoned beekeepers to start with two colonies; this allows more flexibility in boosting a weak or struggling hive.
Nucs ready for installation into the new hive boxes

Skinny nucs 3 frames of brood + 2 empty frames
A lot of mostly good things have occurred since then; future posts will reveal how these two small starter hives have become four active colonies.
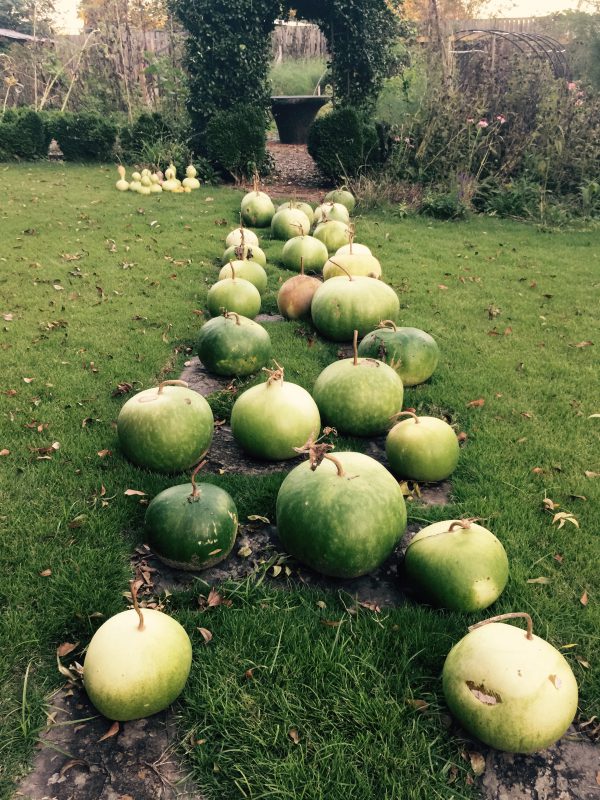
Yard of gourds
Last year I grew bushel basket gourds again in spite of not really needing any more. Actually I’m not sure anyone other than the Anasazi actually needed them (handy for storage of loose items like seeds and dried corn?), so I’ll admit that I just wanted to grow some more.
Really there were three reasons were behind this.
1. These vines have huge leaves and can grow 70 or 80 feet and are effective ground covers for slack gardeners tired of weed control in the far reaches of the garden.
2. I brought a couple of hog panels back from our mountain property and had built a massive trellis that looked pretty silly and useless without something on it.
and finally
3. In a rare sustained effort of creativity, I had made some nice gourd jack-o-lanterns the year before and this used up most of my good remaining gourds.
The rest of this gourd story is mostly in pictures.
The hog panel trellis in use

Hog Panel and bamboo trellis
Ground cover: among the ruins of the old hoop-house spot (and location of future permanent greenhouse)

Gourd vine ground cover
Do these gourds grow large? Yes.

A big gourd
Green gourds ready for the long winter “dry”. (Note that there are at least 3″ or 4″ of stem on each gourd and that the stem is brown. Only cut green gourds from the vine after the stem has gone brown and leave a few inches of stem. Otherwise, you will have a rotten puddle of smelly mush and not an eventually dried hard sided gourd. )
End of season gourds moved to dry on the stepping stones for the winter
By February or March they were sufficiently cured or dried to be carved (one night my visiting daughter suggested these were creepy, like a field of skulls in the dark).

Winter dried gourds
And what do these become?
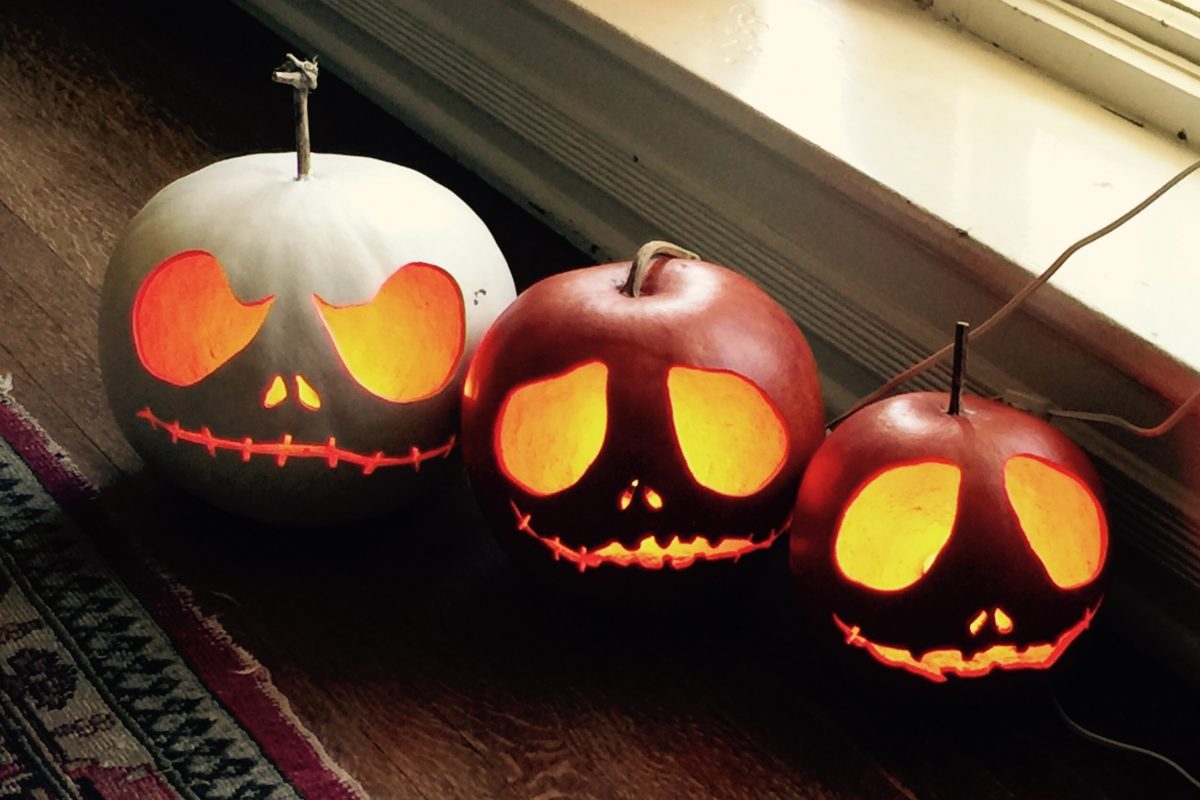
The final product
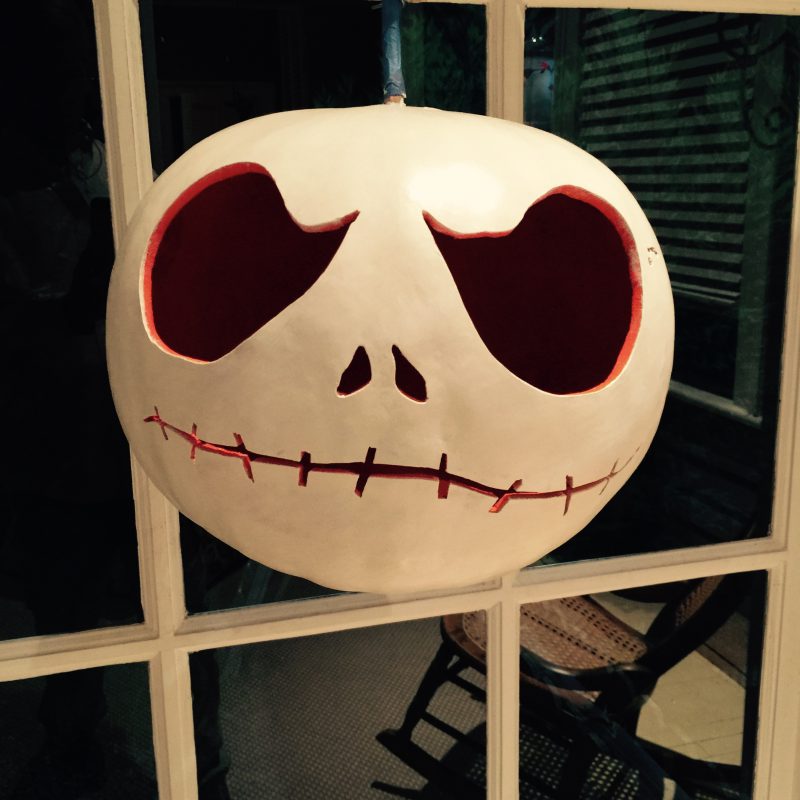
Shamelessly inspired by Jack Skellington
And this is pretty much the entirety of what has occurred over the last two years with gourds. 😉
Life Is Still Good
My last post was April 29th of 2015, 13+ months ago. Posting activity had fallen off dramatically in the months prior but my first attempt @ beekeeping inspired the handful of posts last April. The colony began to run into trouble shortly thereafter and I eventually lost it. This was quite a disappointment as it was the first major “un-success” I had experienced since this whole obsessive garden thing started back in 2009.
Add in the distractions and stress brought on by making a major change involving my “day job” plus an adjustment or two in our lifestyle after becoming true “empty-nesters”, and I just didn’t have the mental energy to come up with fresh posts. The garden itself had become a back burner activity and while things were still happening back there, it just wasn’t interesting enough to me to inspire any sort of posting.
But life is still good.
And as we’ve now mostly worked through these transitions and settled into this new phase of life, I’m back to trying new things in the garden. Over the last few months, friends and family have increasingly been encouraging me to reactivate the dormant blog, so here is my first effort.
What has been going on? This year I’ve been re-configuring the back in order to make space for both the Bee Hive Saga Part II and the salvaged window greenhouse project. The bee saga is well underway and the greenhouse now has a spot from which to spring (but final design is still pending adequate artistic inspiration, so just a spot it remains.)
More to follow, hopefully not another 13 months from now.
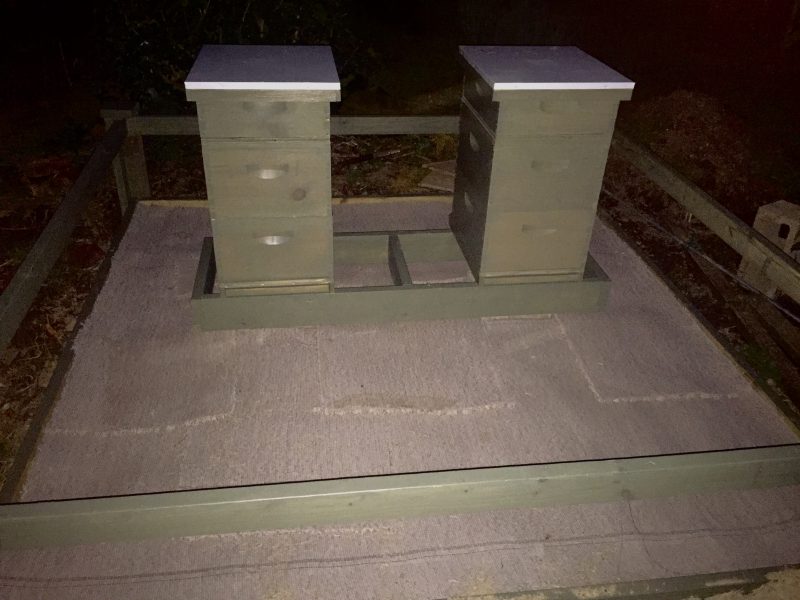
A 3 month old picture:

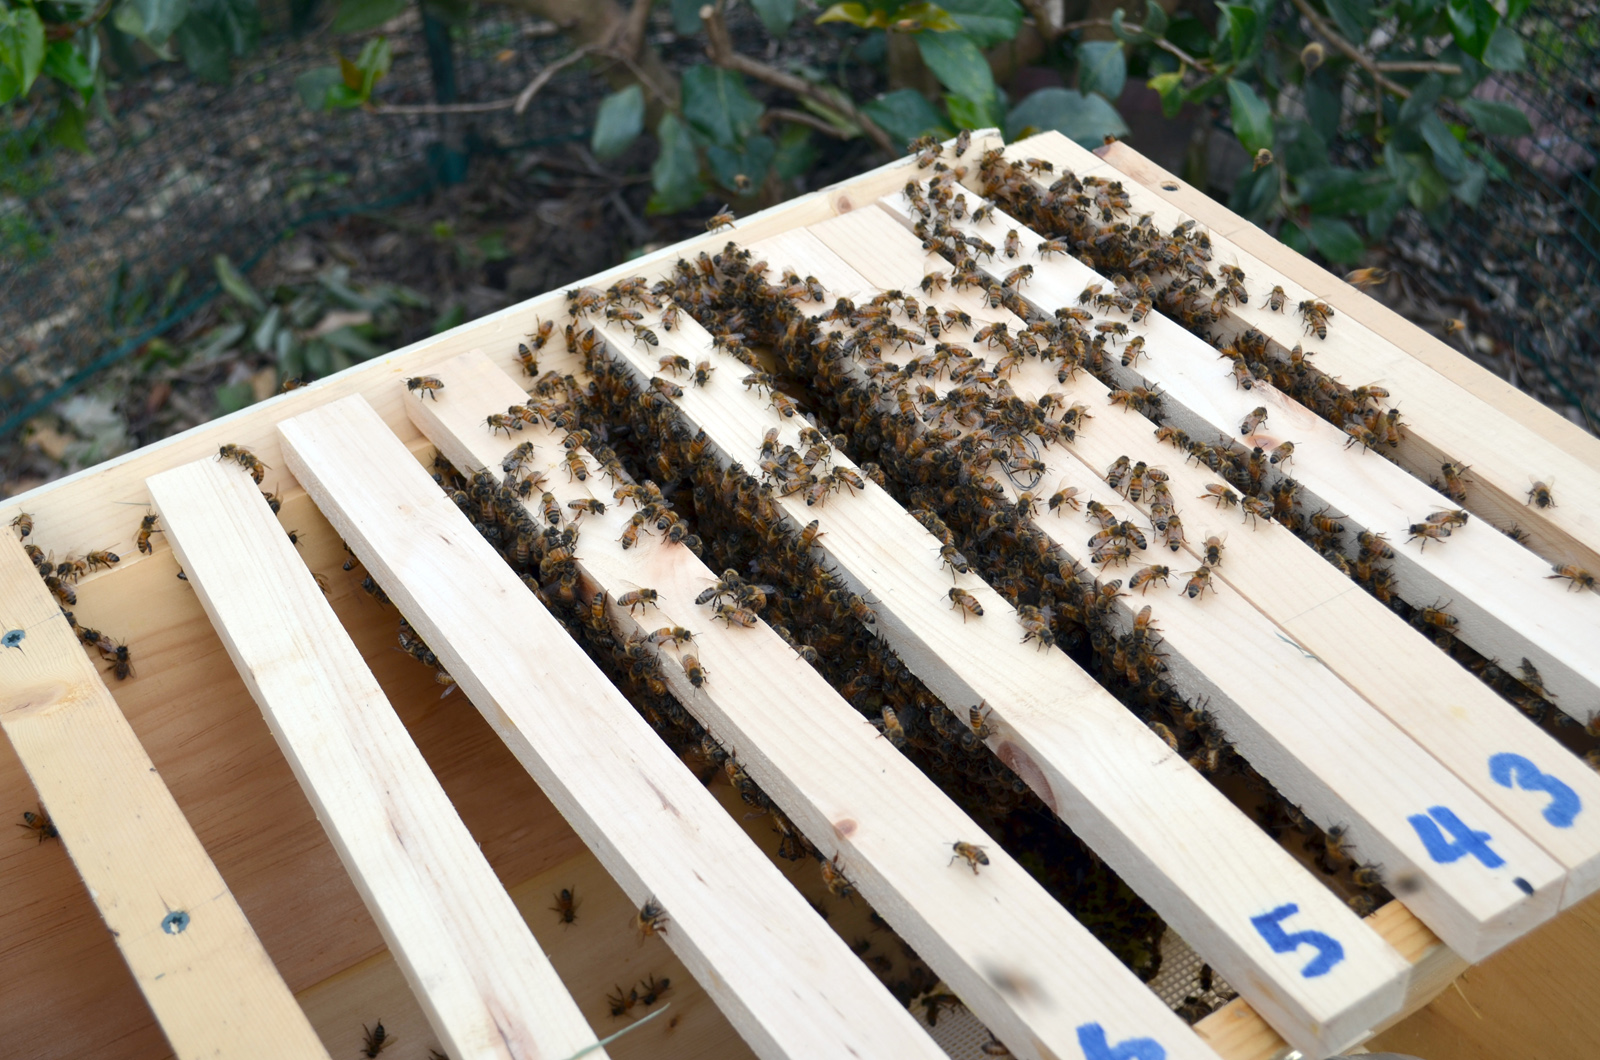
The Bee Corral
Hive Day 6
First let me say that there is more going on on the garden this spring than the new bee experiment and I promise I will get back to posting about these things. But not today…
In the last post I referenced my concern with the comb alignment of these instantly busy bees and I knew I would really need to get in there and see if my “assistance” accomplished anything. On day 4 I noticed that the bees were pretty worked up late in the afternoon and by opening the trap door and peeking in through the window on the back of the hive I could see that another piece of comb had fallen, presumably one of those I “fixed” after loosening. Great, ham hand strikes again…
It was in front of the door but not blocking it; I decided I would leave for the time being and “study” sources on the web. I also noticed that bees were getting under the screen bottom and onto the wrong side of the dividing board in the hive. Time was short and after letting those bees out I decided to reopen the hive in a couple days (Monday, day 6) and address all these issues….
So day 6 arrived and I came home from work and went out to check on the activity. All the issues described above remained so I lit the smoker and suited up. (Note: my issues getting the smoker lit were solved by using a small propane blowtorch I had in my plumbing tools for copper fittings. Thank you Professor Google.)
I used duct tape to seal the seams in the netting at the bottom of the hive; this was easy as the gaps were easy to spot since the wooden board bottom is on hinges. I just opened it and worked from below.
As I started removing top bars I could see that more comb had been constructed but it was so covered with the living blanket of workers that the direction wasn’t completely obvious. I discovered bars 3 & 4 were stuck together, undoubtedly by comb reconstructed in the spots were the cage had been and my “handiwork” had allowed their previous work to collapse.
In the following two pictures you can see what appears to be clumps of bees hanging from the bar; this is fresh comb that is still covered by the bee-blanket made up of workers building it out.
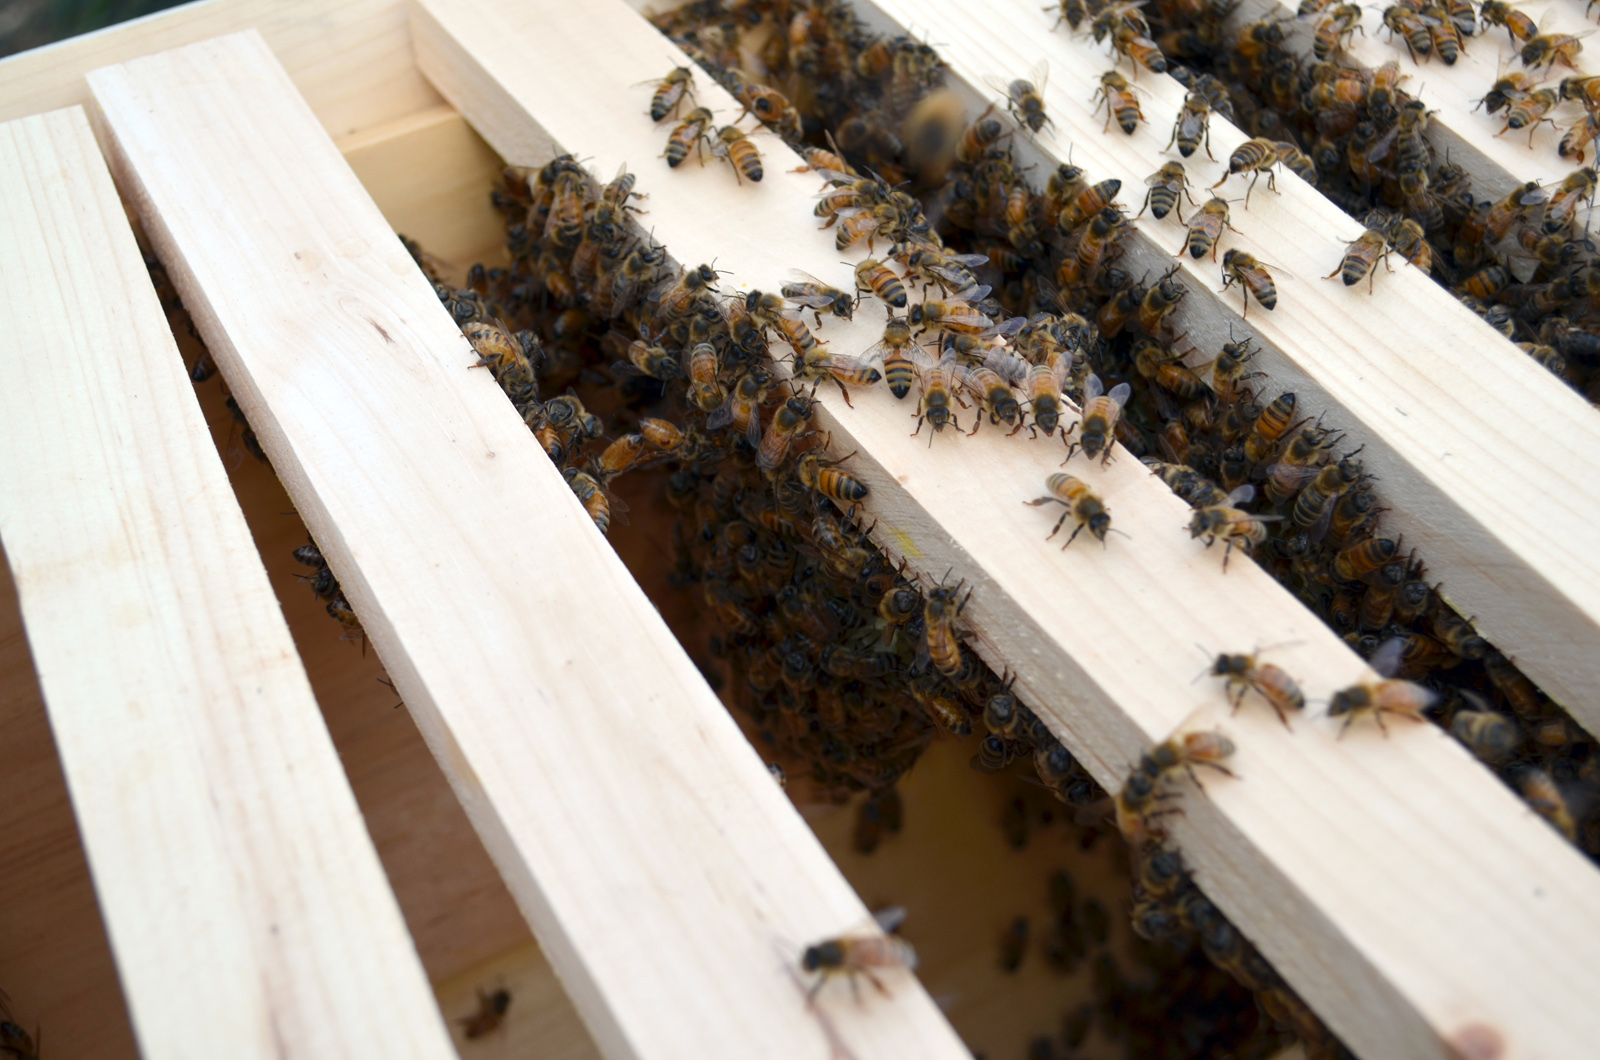

The general direction of the comb looked ok but with the dense cover of workers on it I wasn’t certain that it was in line. Rather than sticking my ten clumsy thumbs into the area, I slowly pushed the bars back together and applied a couple of cool smoke puffs. This scattered the workers enough to reveal the comb, including the second fallen comb spotted a couple days before.

Satisfied, I filled the gap under the divider board that was allowing a few bees underneath into the unpopulated side of the hive. As I was replacing the top bars I noticed that the spline on the the one next to the divider had been coated as if a comb was about to be drawn there. I added a space between it and the divider board so that (hopefully) these illogical bees wouldn’t start building comb there that was connected to the divider…
No disasters. Enough for one evening.
Hive Day 3
Day 3 of the hive means checking that the queen is free and then evaluating comb progress, notably making sure the comb under construction is in alignment with the top bars.
The queen cage is hanging on the yellow strap under the bar; she was free and doing her queen thing somewhere within the masses of workers so I removed the empty cage…

After this, it was time to slowly pull back bars until I found comb. As you can see the smallest comb wasn’t exactly lining up; this would create a mess down the road if left as is. Straight comb begets straight comb, crooked or crossed comb begets hell because the whole hive with be one connected jumble of comb. Better to realign a couple smallish combs that 80 lbs of honey and brood filled comb sometime later this summer.

From another angle the issue is more obvious:
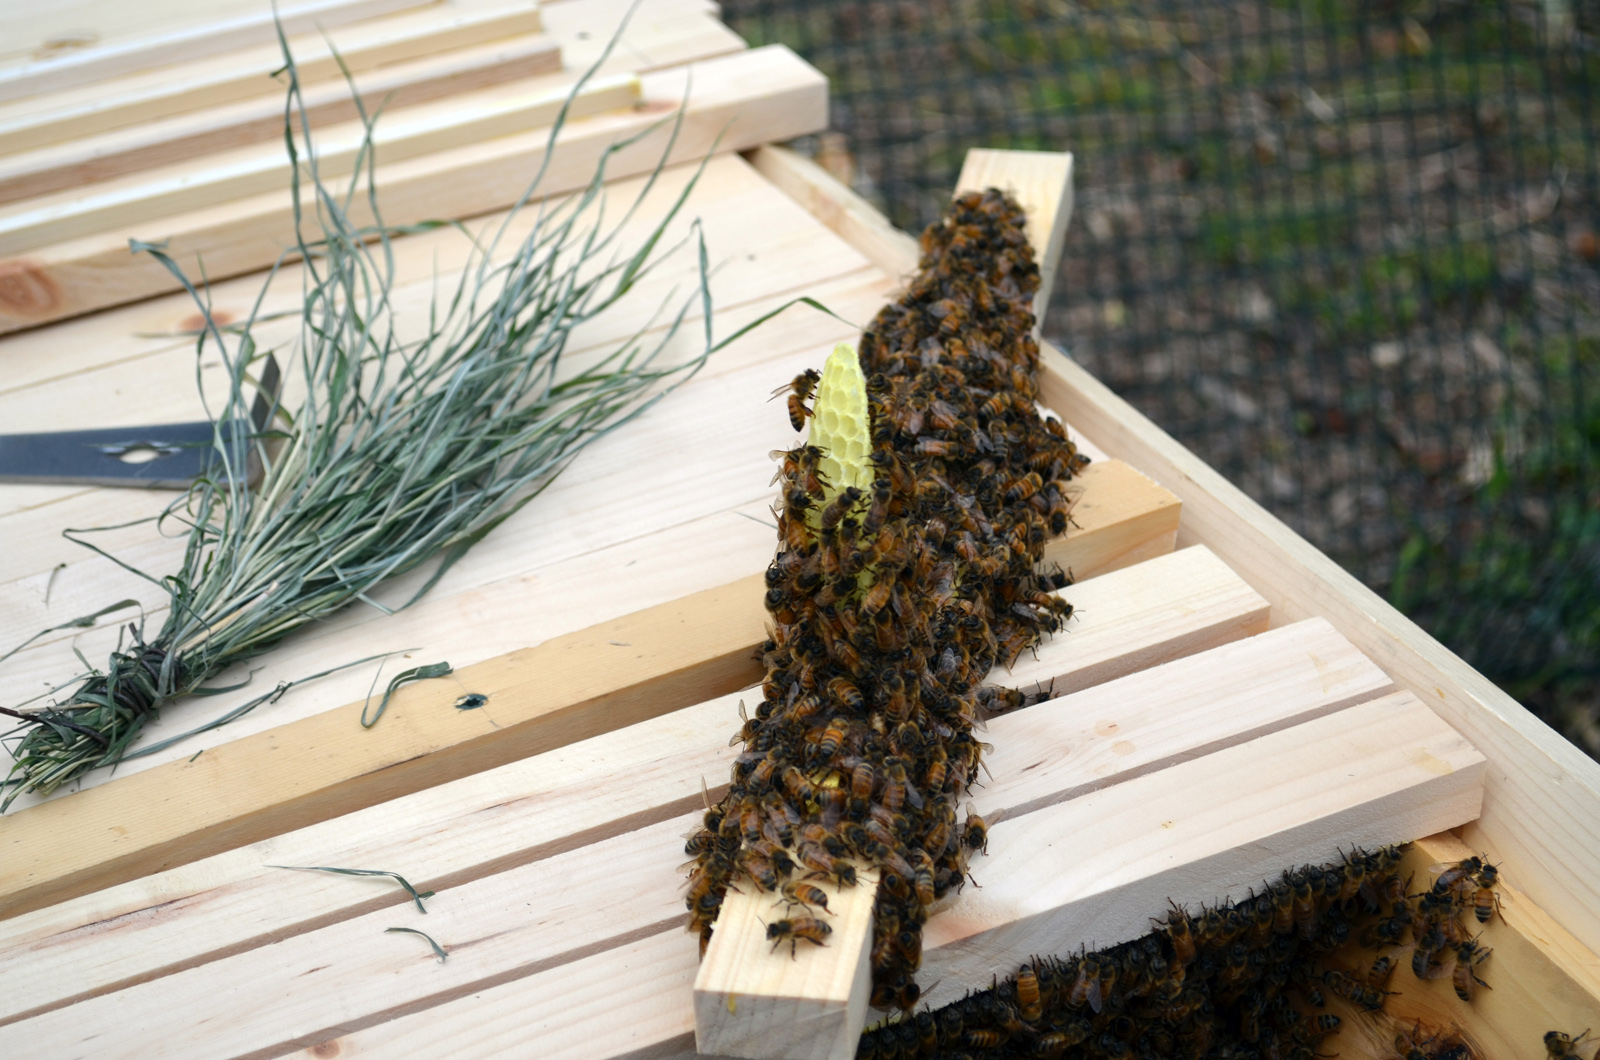
I fixed this by straightening the comb then pinching it on to the spline of the bar, and started to check the larger combs.
Then, “OOPS”… this ham handed beekeeper must have loosened comb removing the queen cage, because about that time one plopped:
The bees weren’t pleased with me at that point, and truthfully I felt awful, like I had let them down. The good news was the bees had begun putting nectar and pollen in the comb, so at least this part was encouraging, i.e.that the queen was doing her thing and the workers were coordinating.
I removed the comb (it was blocking the door and might have been on the queen for all I knew) and put things back together. I spent some time afterwards on you-tube watching and seeing how others handle comb issues, because I was pretty sure I’d have to deal with this again soon.
How soon?
As much as I hate to keep meddling, I need to go back in and verify that this early adjustment was effective in aligning future comb.
So I’ll report again soon on what I discovered on day 6…
Terrified
Today I picked up my “bee package” and parked it in a cardboard file box in my office until I could get it home.
For those who don’t know, a bee package is a shoebox sized cage with 10,000 worker bees (3 lbs) and a caged queen in it. These will hopefully be the initial core of a healthy hive that thrives in my garden; if you properly “install” the package in the hive following the 6 or 7 step sequence, there is a high probability that they will settle in to the nice new home you have provided. Still, sometimes, well, “nature happens”…. you just don’t know, they may bolt (actually swarm is the proper term) in search of another place to set up shop.
Truthfully, I was terrified of handling this mass of bees for fear of doing something wrong and blowing the installation. I’d studied the step by step instructions and watched countless you-tube videos and was comfortable I understood what to do.
Still, until you open the top of a 10000 bee box you just don’t know….
I think I didn’t screw it up (how’s that for a confident statement?). If when I check in a couple days the bees have not vanished and have started drawing honey comb out, I’ll call it a success. More to follow.
Who wants bees up their britches? Not me:


Done (the laggards will find their way up into the hive as dusk approaches.)
Still Here
Spring is upon us, and I’m behind (as usual.)
But contrary to all appearances, I’m actually still here, still trying new things and still full of intentions to make a better effort in posting updates this season.
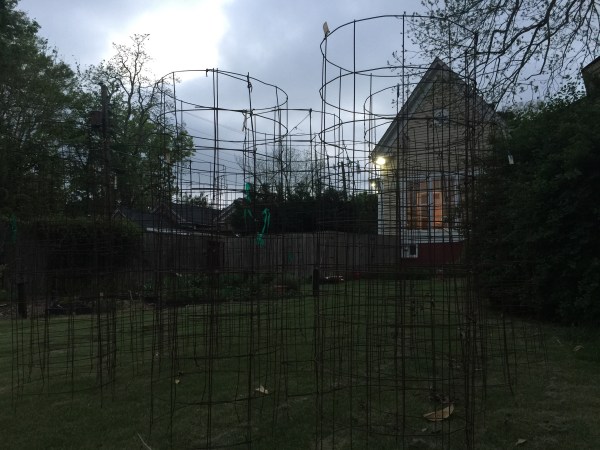
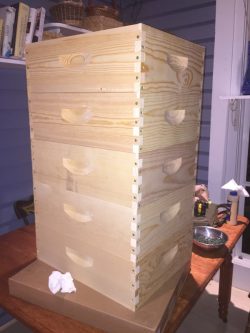
The order of business today (a break in the rain for most of the day was a welcome ls development not to be wasted) included finishing and situating a Kenyan style top bar beehive and a little tomato cage sorting and repairing.
I pick my bees next week.
Yikes.
Window and “shutter” complete 
Moved and leveled in a sunny spot
Cages