There is no gardening in this post
But there is digging.
A friend at work who follows my activities on this blog suggested this is what was really going on in the basement:
How to go about strip mining your basement using scale model remote control equipment.

This has been going on for 15 years; one would think he’d have dug himself out by now. 😉
It is one of the most absurd things I’ve seen yet I couldn’t stop watching it.
Thanks for sharing it with me Ho…
Fully Foiled
I finished the trial seed-starting glow box yesterday- it took another $9.00 of foil backed polystyrene to build out the front and top.
The crudely constructed box in action:

And with a speedling tray full of 128 early spring seeds (short season cabbage, lettuce & chard) and two types of peppers in vermiculite (Ancho/Poblanos and more jalapenos, since we are down to maybe 200 poppers left in the freezer.)

(The two lettuce seedlings are late sprouters leftover from earlier starts.)
I like the high volume/open bottom speedling trays for quantity / early transplants. I use the vermiculite for germination of peppers and tomatoes and carefully move the sprouts to soil blocks for the bulk of their indoor life. More on this later…
I have the lights on a timer to be on for 16 hours out of each 24. The HO fluorescent bulbs are intense (an 1800 watt equivalent between the two) but are significantly cooler than the other main high output grow lights ( HID fixtures like metal halide and high pressure sodium).
The handy soil temperature thermostat control is inline with the heat mat and ideally I can work this to be fairly automatic (ie not cook things).
When it was first set up, the soil temperature was only:

Later that evening it had increased to:

Perfect, right?
Yes, but only if it stays there.
It didn’t. This evening it was 88… not good.
The soil wasn’t warm to the touch though; it appears that my “cooler” lights actually turn this box into an Easy Bake Oven*.
The temperature dropped 3 or 4 degrees immediately upon opening the box, so it would appear I have 88 degree air in the closed box and soil that is much cooler. The mat wasn’t even coming on, so I adjusted things a bit to try to get a better balance.
I pushed the probe a little deeper into the soil so that it had no exposure to the air temperature and then raised the lights a few inches. The last thing I did was to leave a crack in between the top and front panels to vent a bit.
After 45 minutes I checked and the soil temp was 81 and I could feel heat venting from the crack, so I think I’ve got it a little closer to where it needs to be.
*Sidebar:
I was shocked to learn that modern feminism didn’t kill the “Easy Bake Oven”; it is alive and well and even has its own website complete with promotional videos. Wow, who knew? Presenting the Modern Easy Bake Oven
Winter Bites Back
I knew I’d invite a cold snap by posting about “mild winters” and commenting that spring can’t be far off…
Yesterday I bundled up and watered everything really well ahead of the looming windy nights under 20 degrees; I have read that this helps vs cold injury on some plants. After everything was appropriately watered I couldn’t help myself and played “ice maker” with the hose:


And my favorite, but you’ll need to click the thumbnail because I have it set in a larger format :
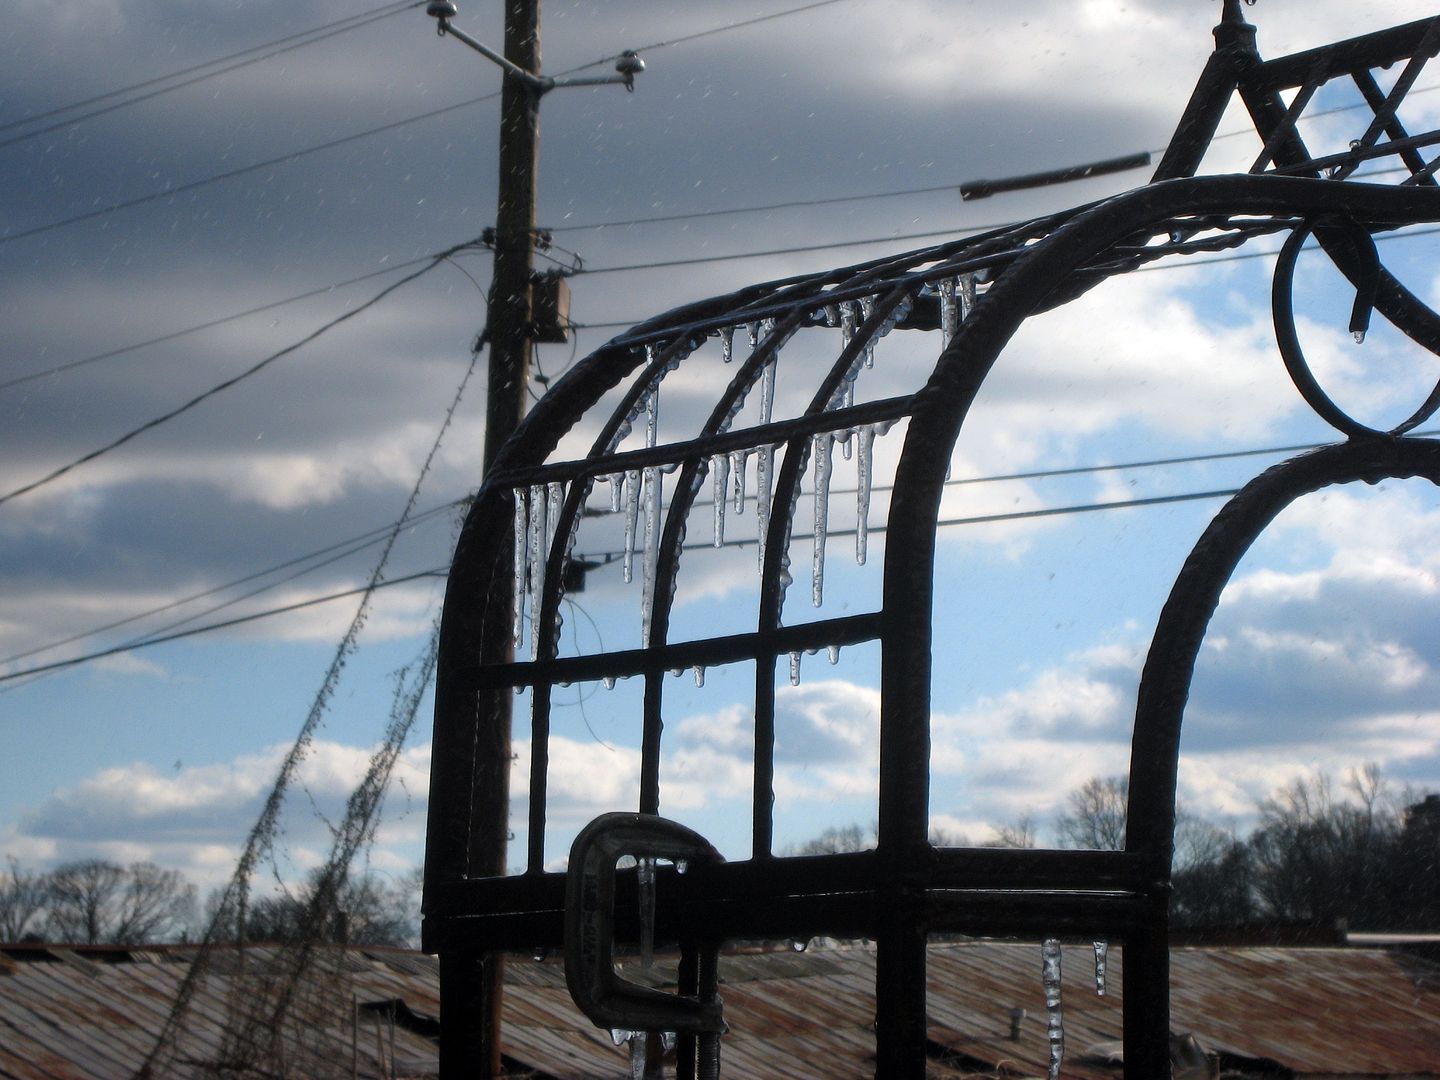
It is amazing how fast things ice up with a fine spray directed over them….
After the ice making stopped amusing me I finished up some other winterizing tasks, including adding a layer of spun poly row cover to shelter the young lettuce transplants in the hoop house. I checked them today and the lettuce seems fine after a night of 18 degrees. The ground temperature inside is a few degrees warmer than outside; the row cover not only protects against frost, it also helps retain some of the ground’s heat.


The parsley was knocked down enough to expose the dill that it was sheltering on the right but it should spring back without issue:

I also completed the seed starting “box” in the basement – more to follow.
I can’t go to jail for tomato seedlings….can I?
Last year the spring mega-seed starting effort took place in Mrs cohutt’s back sun room. I had the lights, heat mat and multiple seedling trays in front of the large south facing window. It was quite a production…
But, in spite of mrs cohutt’s intense desire for me to repeat 2011’s Herculean effort of junking up her sun room, alas, it is not to be…..
I’ve adopted a much lower profile this year; in fact it is just the sort of lower profile that a horticulturist of certain types of cannabis might adopt if they did not wish the world to know what they were doing.
I’ve rigged up a seed starting system using foil backed polystyrene sheathing that accommodates my heat mat, the two lights and four standard 1020 flats of seed starts. I’ll rig a front panel and plastic “roof”, but this is pretty much it:

Under the lights (just to flatten the heat mat overnight) are one of the larger speedling trays and a 1020 flat full of freshly made soil blocks. The lights will be on a 16 hour timer and the heat mat will be thermostatically controlled based on the soil temperature.
Back to the original question:
Last year the intense glow of my grow lights could be seen from a quarter mile away but attracted no attention. Will the same lights, buried in my dungeon of a basement and seeping a curiously bright and white glow out through the cracks and crevices inherent in a 143 year old foundation, invite inquiry from the local authorities?
I guess we’ll know soon enough.
I can’t go to jail for tomato seedlings… can I?
Under poly
After the early mistakes in the hoophouse things seem to be going a little better…
I’ve done a better job regulating temperature; likewise I’ve figured out how to moderate the humidity ( i.e. keeping it somewhere south of the 95% that turned the house into the petri dish and vermin paradise which subsequently wiped out the lettuce and broccoli). The mild winter helps; I can leave the door open most of the time and have a box fan on a timer to circulate air and improve ventilation when the auto-window opens.
The speedling tray over two water barrels works well; the “micro climate” there is somewhat more stable due to the heat sink / temperature moderating effect of the barrels. I have a couple types of kale and some bok choy in a tray now; they will be ready to transplant in a couple of weeks.

Gee, can anyone tell which is the Russian red kale?

The lettuce seedlings transplanted a couple weeks back have doubled or tripled in size; over the next few days they should double a couple more times and we’ll be in the spring perpetual lettuce feast (a lettuce “binge” maybe.)

The winterbor kale is exploding

And the brussel sprouts keep plumping up on schedule

This will be much more productive next year; I maintain that you really don’t start to figure things out until you kill a few plants trying.
And I certainly did this year…
Herbs: thinking about perennials & self seeding annual/biennials
My original front plot consists of 5 beds; four 4’x8′ and one 4’x4′. While I actually managed to produce corn in two of the beds the first year (click the thumbnail below for the ridiculous sight), over the last couple of years I’ve moved most of the real “production” to the more substantial beds in the back areas.
Corn:

I converted the small bed into a strawberry bed and have for the most part kept the plantings in the rest of these beds to herbs and smaller items.
Ha.
I have learned that given the right conditions, sage and rosemary can become quite large. Also, self seeding annuals like Thai basil need little encouragement to produce multiple volunteers the following season.
With these “learned lessons”, I am going to try and do two things this year:
1. Transplant the gianormous rosemary bush and the large sage plant to a spot outside of the raised beds. I hope to place the rosemary where I can ungirdle it and let it assume a more natural shape. Note the shape in the previous post; there is a reason it grows upward for a couple of feet prior to assuming the natural open sprawl typical. It has a girdle- actually a wire ring attached to a short channel post that initially “umbrella-ed” the bush into a more upright habit. It actually worked for a little while….
A zoom in around the base of the rosemary “shrub” shows a row of rooted branches outside the bed. I weighed them down with bricks last September and now they are all nicely rooted (as a back up to moving the big one.) Note also the strawberry runners encroaching as well….

2. Allow the self-seeders and smaller perennials to take over their own portion of the beds. With the Thai basil it will be easy; I have no that I will have hundreds of volunteers everywhere in the back; all I need to do is remove them from the areas I don’t want them.
The oregano is in its 4th season and a little pruning back is all it needs each year. It is prone to put down roots wherever it touches the ground and I’ve already rooted a new start against the fence.
Oregano on the left, flat leaf Italian parsley on the right.

Sneaky oregano cutting from last September hiding among the leaf litter, wood chips and dried grass clippings:

The significantly cut back (as of yesterday) Sage and one of it’s cuttings from last September:

(I removed about 2/3 of the plant; the branches to the left are rooted and will be cut, dug up and transplanted to another corner of the yard.)

I’ve cut the sage back like this before and it has rebounded without issue; I think I read somewhere that this isn’t supposed to work. Regardless, the offspring plant is taking off just fine. (I don’t do any cooking with sage; I just like the smell and the flowers are great to attract pollinators to the garden.
The rosemary bed has a good stand of flat leaf parsley (left) and cilantro going:

And that is the entirety of my thoughts on perennials & self seeding annuals/biennials
Waiting for the rain…..
I believed the weather forecast that predicted the day in the garden would be lost.
So I didn’t really want to start on anything big; I wrestled the bat house up onto Lizzies porch then figured a little weeding would be good if the rain held off a while.
The rain stalled, it got here finally @ dinner times so I spent most of the day pulling weeds and cleaning up some. Pretty relaxing all in all- the winter clovers and related weeds are much easier to pull than summer crabgrass and pecan seedlings.
Red russian kale

Carolina Jasmine


Monster rosemary in bloom:

Watch your step:

Tomorrow I set up seed starting tables in the cellar.
Get your pencil we have a stencil
(Yeah, I know, a new high water mark for post title lameness has been established. What can I say…)
Last night I thought it would be smart to extend an olive branch to Mrs cohutt following our mutual realization that the “Trump Tower” of bat houses is on blocks in our back yard.
So, I offered her the opportunity to provide input on the appropriate stencil design for the exterior of the tower.
In return, she offered me the opportunity to give my most serious consideration to any design that caught my eye, as long as it was indistinguishable from this one:
(click for a larger version)

We agreed that I liked whatever she liked and the deal was sealed.
(FYI visit VectorTemplates.com for interesting graphics, some of which are free use)
Hang’em High
Please forgive me for using an old Clint Eastwood old movie title as a lame intro to this post. (Clever titles involving the word “bat” continue to elude me).
Yes, this is another update on the progress of the incredible-super-awesome-but-way-bigger-assembled-than-it-looked-on-paper bat house.
It is complete, other than some caulking and stain touch up work that needs to be done when I can actually do it in daylight (caulking small, dark cracks @ the seams and applying almost black stain in poor lighting doesn’t work very well.)
And it is huge.
And heavy. 30 lbs? 40 lbs?
Anyway it is done and propped up waiting for two sturdy poles to be erected out back and me to think of some way to anchor this monstrosity to them 16 feet off the ground (<<<< the Clint Eastwood movie reference applies here).
Definitely do check back in for this feat; it will be like a gruesome automobile accident that you just can't make yourself stop looking at.
The house plus the two pieces of (conveniently scavenged) rusty galvanized roofing, ready to be installed:

Roof installed, here are the bat house “glamor shots” in all their cyber glory:


What bat-appropriate stencil should I apply before it is installed?
(I’ve lost my mind)
