Time out from the greenhouse project
I’m in the middle of a rare stretch where I am more away than I am home. Being a home-body backyard project recluse and all, this is killing me.
Lucky there is enough time to get things finished and cleaned up in time for family arriving for Christmas…
Or was it Thanksgiving?
Both? Oh yeah… (oops.)
(to Mrs cohutt: Yes dear, I know have a lot of work to do by next Thursday. I’ll find a way. heh..)
Anyway… the greenhouse is doing its job just fine so far. Granted, it hasn’t been so horribly cold yet, although we did have two nights in the 20s last week.
But already I am noticing some things I really hadn’t stopped to think about.
First, the humidity is much higher inside vs the colder autumn air outside. This means more consistent soil moisture and less transpiration, which already has made quite a difference in the growth rate of the plants inside.
Also, the structure provides shelter for the plants from the winds that have been kicking up as the autumn air cools. Of course this helps with moisture as well- both for retention in the soil and again slowing the rate of transpiration directly from the plants.
Examples:
Broccoli: Tonight I cut two of the largest heads I have seen so far in my 3 seasons of fall gardening:

Sugar Snap Peas: The plants outside have been hunkering down in the winds and have done ok, but the plants inside have gone wild… they are upright, touching the ceiling and covered in blooms. During the two weeks spent under some degree of cover they have left the outside plants behind.

(Also note the water drops on the surface of the cover. I assumed this was on the outside since it had rained a little earlier in the day. As I found out when I thumped the surface above me, it was definitely condensation on the inside of the greenhouse.)
Sealed
Actually I should say sealed but without a proper door.
For the last couple of I’ve postponed the door’s engineering/installation and instead have been racing the clock to have the structure’s “skin” effectively sealed ahead of the first freeze of the season. The lows are forecast @ 28 and then 27 Thursday and Friday; I believe the system as currently set up will work fine.
Once I got the back up tonight I tacked the skin down to the framed “foundation” along the bottom perimeter. To do this I used “singles” of lattice sold for repair and trimming of normal pressure treated lattice panels. The plastic is reinforced at the points where the screws secure the strips with squares of duct tape.
I took the shots below then watered the beds using the box inside the structure; the back garbage can is filled with water to act as a makeshift heat sink for now.
Front to back:

Back to front:

View from the sun room when just the 60 watt light is on:

That’s all for now. 😉
Polytunnel Progress…. (s-l-o-w)
Had I started with a perfectly flat piece of ground, picked the dimensions, measured and pre-cut everything, snapped it together and THEN built beds in it……
I’d have been done a couple weeks ago…
But I didn’t- the beds were there, the grade wasn’t flat, the dimensions were customized as I went, AND I don’t know exactly what I’m doing or whether this will even work.
It is my kind of project I suppose. 😉
Anyway, I did make some progress this weekend..
Saturday I scavenged a window and spent the afternoon framing the norther (house facing) end of the tunnel.
The window is a scrap sash piece that measures 36″ wide x 19″ tall; I didn’t have luck finding a suitable door so I decided to put the window on the north end and the door on the back or south end. Why? I’ll probably end up rigging a homemade door up and the likelihood of it being an eyesore is pretty good. I’d rather walk around to the back to enter vs have an unhappy Mrs cohutt looking at an ugly door from the sun room all winter.
So the framing ended up being sort of oddly radial; I wanted to put enough of a frame to stabilize the whole tunnel and give a broad span to tack the plastic to in order to keep flapping to a minimum.
Saturday afternoon this was the view from the outside, with the (filthy) vent window tacked in temporarily:

From the inside, the same:

This morning before I hung the window I hosed it off and the dirt didn’t budge; there is no telling how long it had been sitting in the yard of the salvage place. Earlier I noticed that a smallish luffa had actually dried and turned brown on the vine so I picked it and peeled the skin off to see if it would work as a scouring pad to loosen the dirt.
(Even though I had planted these for the primary purpose of growing these “sponges”, I was still taken aback when there was in fact a luffah under the skin. Damn, just like they said there would be.)
The luffah:

The clean window, installed with the auto-opener freshly installed as well:

And from the outside:

The black piston on the opened contains a wax that expands as temperatures rise so the piston forces open the window progressively and there are springs that pull the window closed again as it cools. The directions said to refrigerate the piston so that it is as retracted as possible during installation. I did this and had no trouble setting it up.
But would it work?
Actually, yes, it would. I found it had opened the window a bit as it warmed up while I was inside eating lunch:

I got the back framed in then took an unplanned nap sitting inside in the warm sun. When I woke up, I disconnected the plastic and slid it back towards the south by about a foot (I didn’t leave enough overhang on the south end to allow for an easy seal of the joint between the wall and the end hoop. DUH.) This put me off schedule to finish the ends this weekend so I’ll have to work a dark evening or two this week to finish up.
Still, the north end is almost completed; the experience gained will make the south end move much quicker I hope.
So here is the almost complete product:

(Note the loose plastic will be trimmed and taped and the dip in the middle of the structure will firm up when the back side is done.)
From the inside:

I feel pretty good about it at this point; it should be completely functional after one more work day.
(I am tired, please forgive the grammar/spelling mistakes overnight; I’ll probably see them tomorrow and will correct them.
Grounded Greenhouse
Crisis averted.
The wind died down and the structure came through just fine:


Tomorrow morning I’ll dig through the inventory at a couple of local construction salvage businesses to find a suitable door and window. Suitable means less than $30 total, mostly glass and mostly smallish. The window will be easy, I just need a framed piece of glass, half of a normal window. I’ll decide whether to locate the door on the front or back of the structure once I see how ugly it is.
Ok, I’ll admit it, after Mrs cohutt sees how ugly it is.
In the meantime, check out the early leader among the broccoli plants this year; it looks like we’ll enjoy the first harvest of the fall next week.

The second crop of joy choi is coming along fine and spicy micro greens are becoming not so micro and their flavor is intensifying, although the cooler weather has helped keep bitterness at bay. (They are flopped a bit after a quick watering).
Giant polytunnel kite?
Maybe not.
I suppose I’ll know for sure by tomorrow night.
The wind jumped up after the rain came through tonight and was coming uncomfortably close to lifting the northern end rib off of the re-bar anchor. I snugged it back down and a gust immediately pushed it further up and started to lift the next one as well.
I staked the end rib to the ground with paracord to buy some time so I could screw the rough cut foundation frame together (rather hastily). I managed to anchor every other rib to the frame and the whole structure seemed to hold together better; hopefully this gets it through the next windy 36 hours in one piece.
I didn’t frame in and seal the back Tuesday evening because I was concerned that I would create a parachute that would rip from the ground in wind. I figured the open-on-both-ends tunnel was a better option; I have no doubt it is better after seeing it tonight, but when the air gets under it it looks like the whole thing is going to take off.
I won’t be happy if my new hoophouse is in the next county when the sun comes up tomorrow, but I will have learned my lesson and can recover this weekend. (“They” say that life’s most well remembered lessons are retained from those events that end in abysmal and utter failure. Maybe so, but I’ll most certainly kick “they’s” arses tomorrow if any are dumb enough to bring it to my attention. 😉 )
No pictures tonight; more garlic is in the ground but that isn’t something you can really post about two nights in a row is it?
Garlic. (I’m late)

A little late, but maybe not late enough to materially affect next year’s harvest.
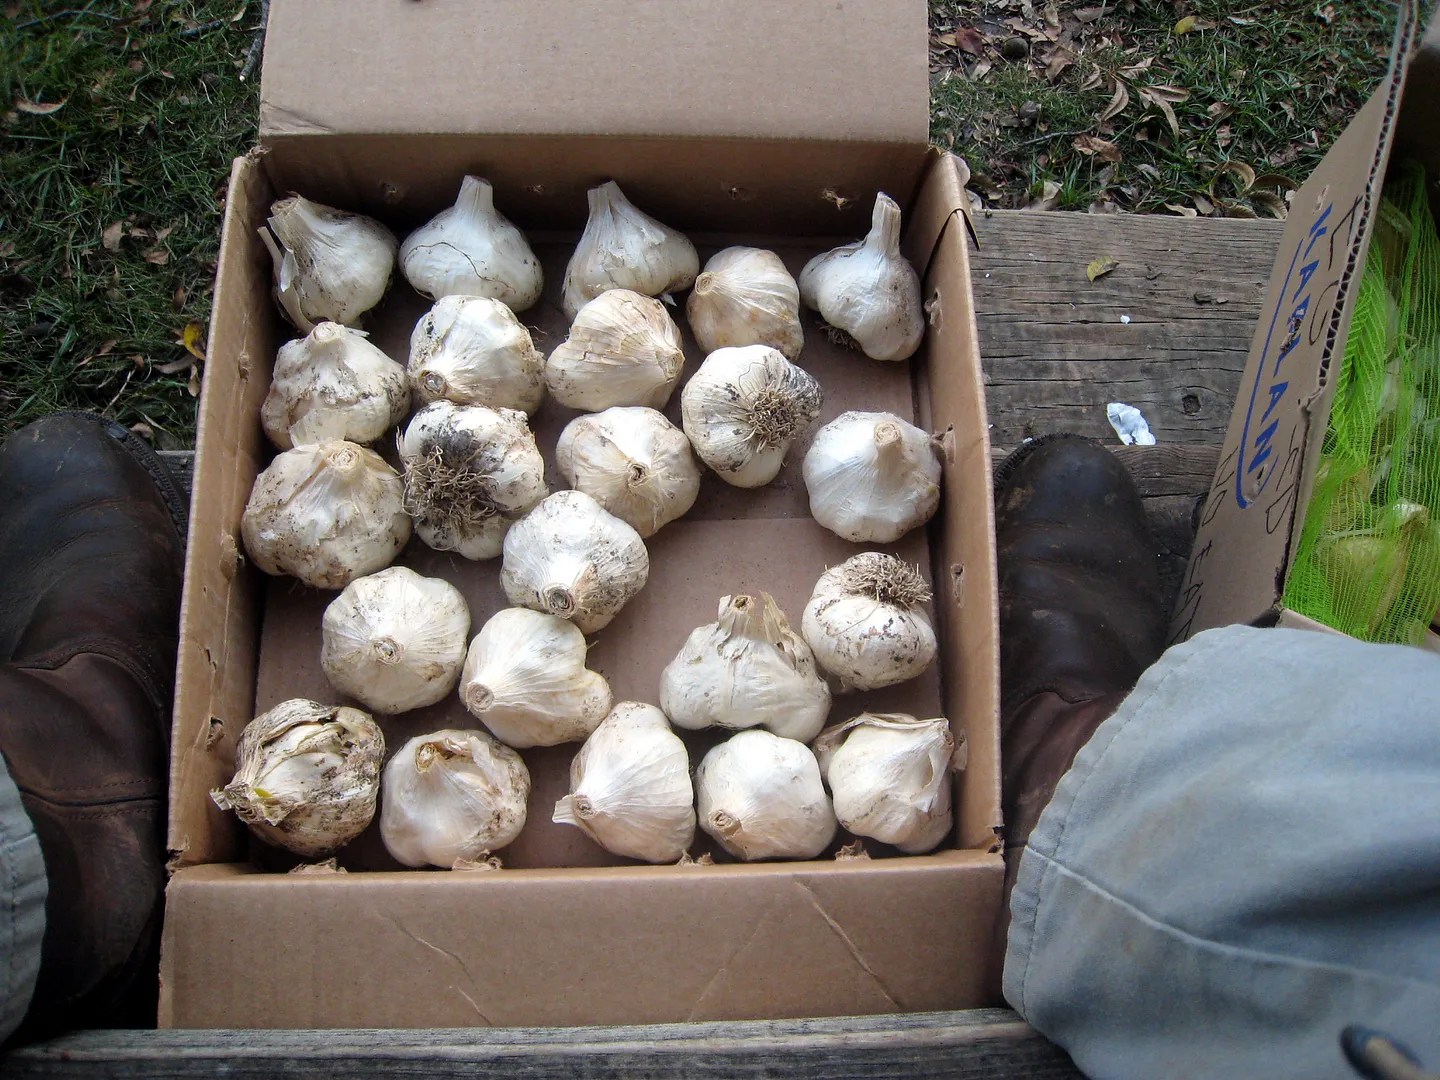
In June, I set aside the largest heads of the silverskin or softneck garlic that invaded my backyard with last year. The method for consistently good long term garlic harvests is to save the best of the crop as seed for the next season, and and once you have the luxury of “bounty”, to only use the largest cloves off of the largest heads. Each generation in theory (and actually in practice as well) is more suited for the micro environment of your garden and the yield increases over time. Sort of a backyard Darwinian lab eh?
Anyway, I pulled the boxes of my “seed stock” from the cellar this evening and made some headway getting it sorted and in the ground (with markers/labels this time). I was pleasantly surprised as I hadn’t remembered the heads to be this large:
While I was at it, I pulled the elephant garlic stock as well. The cloves are so large that it would be expensive to buy any meaningful amount of seed stock at once; it seems like last year my $13 lb of EG seed only provided 5 or 6 cloves. My cheapness won and I held back the entire crop for seed this year- a little over 20 large cloves I think (duh, I didn’t count before I planted). As a bonus I have about the same number of the little “bulbils” or “bulblets”, which are about the size of a large clove of normal garlic. These will each grow into a full head of EG, but it takes 2 seasons to take place (more on these later).
EG “seed”:

Finally, I also prepared my only purchased seed garlic for the season, 3 heads of “Ajo Rojo”.
I’m hoping the Ajo Rojo lives up to my expectations. It is a “creole” garlic, an oddity of sorts because it looks and tastes more like a hardneck variety, but thrives in much warmer climates than is typical for hardnecks. The source of the creoles was southern Spain; slowly they are catching on here and sufficient seed stock is becoming available to hobby gardeners like me. The hardneck varieties tend to have more distinct “gourmet” flavors vs the soft or silverskin varieties. The fiery hot varieties are mostly hardneck; the issue for me is that hardnecks tend to favor much cooler climates where days are shorter and the number of cooling hours in a season are higher than can be expected in N GA.
Enter the creoles, technically more closely related to the silverskins but disguised as a hardneck.- they have adapted well to Arizona, Texas and Louisiana and are beginning to gain a gourmet following. This year we will see how they do in Georgia. 🙂
As you can see in the picture below, these look nothing like the white silverskin garlic you see in the local grocery store (and so far in Cohutt’s garden ;). Note that there are no smaller central or interior cloves; all cloves run from the center scape stalk (hence the “hard” neck) to the outside of the bulb. They do have the typical paper skin of “regular” garlic but I removed it for the picture and in preparation for planting.
These three modest heads were almost $5 each. The softneck garlic (“California Early” I think) purchased last year was only $4.00/lb or about $.50/head.

I moved the smaller bed (3′ x 3′) that served as host to last summer’s cucumbers into the open corner of the hoop house and have planted the best Ajo Rojo in it. I have read that a little bit of cover can make a significant difference in the size and quality of garlic, so the expensive creole seed is this year’s officially pampered greenhouse garlic.
The bigger polytunnel/hoophouse project, post #2
A few days ago I posted about the more ambitious hoop house plans I have for this winter.
I’ve made a little progress since then. I decided to make it a little longer so that I would have more space on the ends; the effort to engineer a 22′ structure with 6 ribs vs a 20′ one with 5 ribs seemed negligible. Over the course of the week I added the additional “ribs” then worked on the laterals; for these I used 1/2″ schedule 40 pvc. It is fairly flexible but seemed to provide sufficient stability once all three were installed. I pre-drilled all of them at the same spacing based on the ribs at the bottom (fence) side then installed the lower one at a height I picked “by eyeballing” it.
From there I adjusted the spacing of the ribs on the top side to line up with the holes on the second lateral. This took a minute – all but the two end ribs had to be moved at least an inch or two. I drove in rebar at the correct spacing then moved the base of the rib to it. The pvc is flexible enough to do this without much trouble; once completed I pulled the old rebar out and then adjusted the next one.
Once spacing was complete I eyeballed the upper lateral for both height and level then attached it. The 3rd center lateral was easy- the spacing was already worked out and it was up in no time.
The joints were “connected” using a 1 1/4″ screw then topped with a zip-tie. The screw was long enough to go through the 1/2″ lateral completely (duh) and just one side of the 1″ rib. IF I do this again next year (and take the fame down for the summer) I’ll drill the joints completely and use bolts to secure them. I wouldn’t have a lot of confidence in the current scheme for more than a season (hopefully it is sufficient to make it through the winter. 😉 )
The next 3 pictures show the finished frame from 3 angles; note that the lower bed has last year’s hoops installed and was covered at night to protect the bed from the light freeze we had over the weekend.


The next step was to measure and cut the skin; I ordered clear 3mm “overwintering” plastic from Greenhousemagatore.com .
I went with the lighter film for economics and flexibility. The roll has enough for 3, maybe 4 structures of this size. If this configuration works I get 3 or 4 years of coverage; if it doesn’t work I can reconfigure in a different shape or size next year.
I was happy to find that the roll was marked by the foot and folded/rolled a lot better than the contractor plastic I used last year.

Once cut, I spread the piece out in the yard and attached paracord on the corners and in the middle. To do this I taped a 6″ piece of duct tape to the edge then bunched the plastic up where the tape was and tied the cord to the bunch. The tape gave the plastic a little more “body” that I thought would keep the rope from sliding off- I didn’t want to over tighten the knots and damage the plastic.

Next I bunched up the whole covering and lightly secured it with the ropes like a mainsail. This allowed me to carry it to the lower side of the frame and lay it at the base to prepare for pulling over.
Once there, I unbound the paracord and tossed it over the middle lateral and then secured the lower side of the tarp (the side opposite of the side with the paracord attached) to the outside two ribs at their base.

Now I was ready to start slowly pulling the cover up and over the structure a little at a time using the paracord.

It didn’t take long to have it pulled up and over:


When I ordered the covering I also picked up some “snap clamps” that secure the covering to the pipe- good stuff. I ordered the 4′ ones and cut them into 6″ sections (because I am cheap).
Using these, it was relatively easy to adjust the tarp and get the tension right across the whole surface.


I was really surprised at how clear this plastic is; I guess I was still expecting something closer to last year’s whiteout contractors plastic. At dusk, I took one last shot with a 60 watt light on inside:

NEXT STEP:
The wooden base or “foundation” and the frame for the two ends.
Gardening @ night?
Sometimes it is necessary if you want to beat winter to the punch (and spent September and most of October just thinking about it….)
The ribs of the high tunnel are in; next come the lateral braces then the cover.
It may be up in time.

(This is a phone upload, pls excuse the picture quality, the Blackberry camera gets a little fuzzier every week.)
Today started like any other…
But then late in the day work threw me some irritating curve balls but i didn’t get them addressed because I had to hustle home to give the borrowed welder back to the person who loaned it to me then I figured as long as I’m home early and have daylight why not run over the Home Depot and pick up the last of the 1″ pvc needed to finish the hoop house so when I got there they only had one piece which wasn’t nearly enough so I got even more frustrated and stormed out and came home again to find the outside cat had been let in by accident and was squaring off with the inside cat and didn’t appreciate being swept out the side door with size 10 2/2 Justin boots which caused me to bruise my forearm on the door frame so i stomped out to the garden to find something to do only to be called back in since I promised to grill the flatiron steaks which turned out to be pretty damn good after all was said and done but I was still agitated since I had accomplished none of the tasks I wanted to get done and it was dark already but fortunately I had a drop cord and a shop light outside already so I set up a night work space and dug up a 12′ trench for raspberry bushes then decided I couldn’t stand looking at the 7′ tall rotting stump that had served as a corner for a yard implement shed that is going to be replaced so I grabbed my axe
then beat it absolutely to frickin pieces.
…
And I feel much better now.
😉
How was your day?


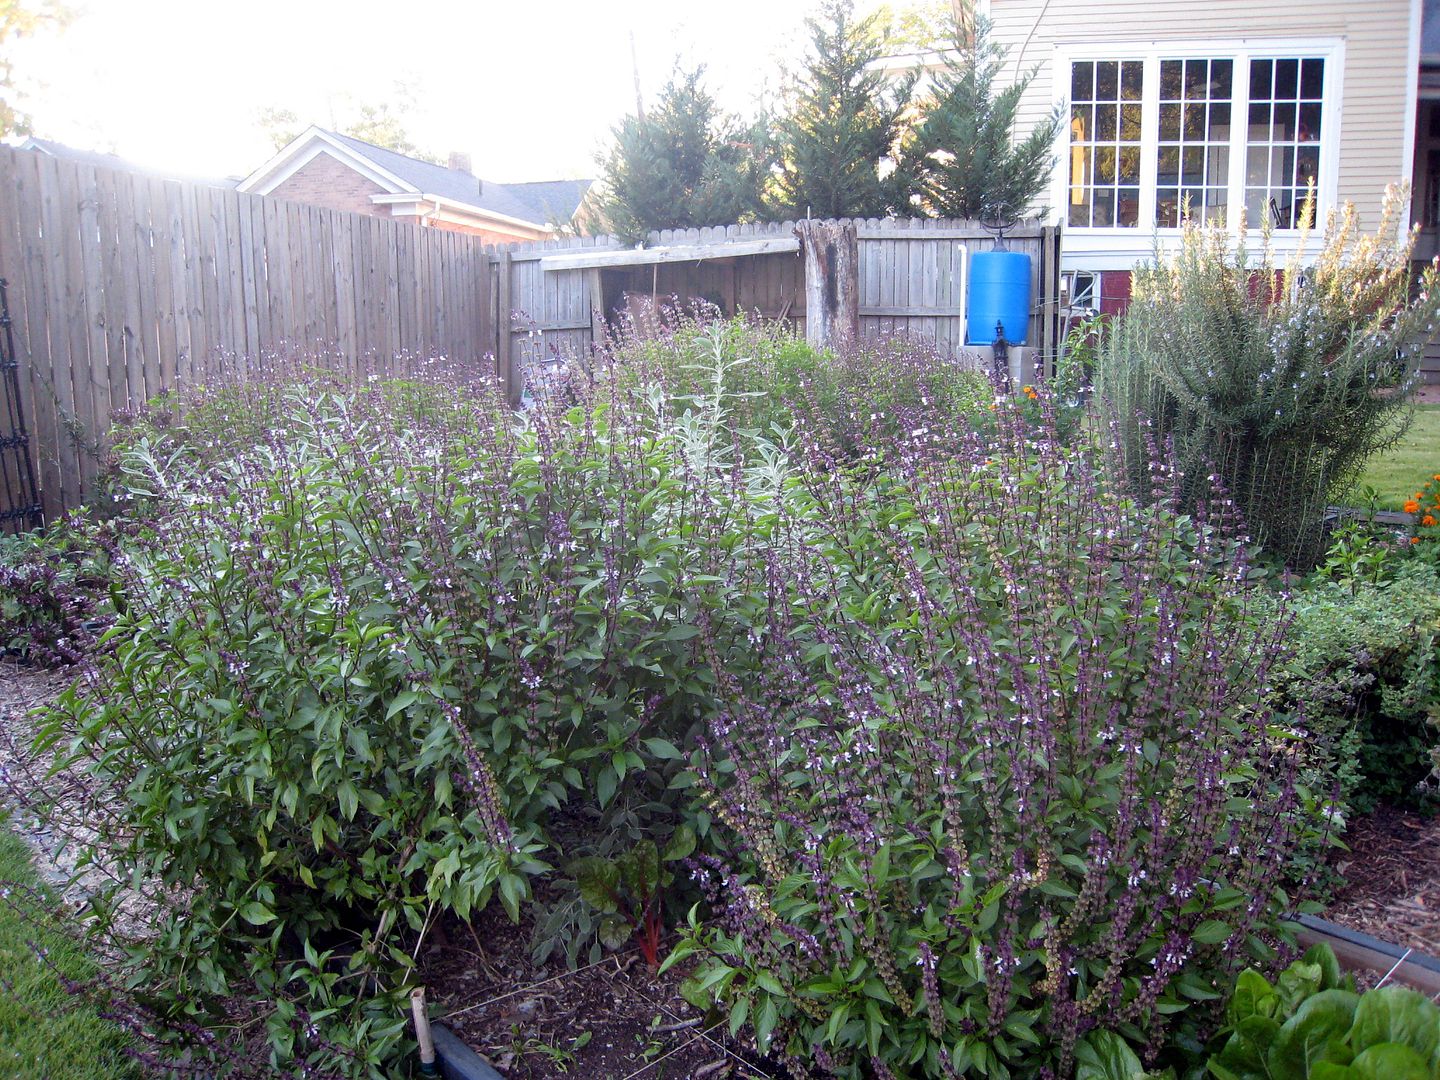
(The offending stump is in the background to the left of the blue water barrel)