Time out
Today was a long gray drizzle of a day, not the spring workday I had hoped for earlier in the week.
Fortunately, the day turned out to be a pleasant one; we had guests come through on relatively short notice and it turned out to be the ideal way to watch the rain drip down the windows. Our afternoon was spent with one of Mrs c’s childhood friends and her husband (who turned out to be just as much a pigheaded solo hobby & household mega-project undertaker as I am.) We covered a wide array of subject matter from nest emptying parental transitions to gardening, guns and general home project tales.
Tomorrow may provide better working weather so perhaps I can make some progress on the new beds.
In the meantime, some annoyingly out of the margin garden pictures from earlier in the week:


Garlic forest discovered in north GA
Seriously…
A forest of it…
right here in north Ga
(I parked my truck just out of the camera view.)

These are all “California early white”, a basic softneck variety similar to what you would find in the grocery store (only better.) I’m encouraged by the stoutness of the stems this early in the year; I anticipate having some kingkongish sized bulbs in June.
Also planted last fall, I show some good stands of french red shallots, a handful of elephant garlic plants scattered about plus some unknown variety of hardneck garlic saved from last year. I’m looking forward to the smell of all this curing in the warm summer air in late june … .
About those gourds
You might recall that I posted quite a few gourd related posts over the last growing season. It has been a long cold winter and I know many of you have had gourd-posting withdrawal.
A couple of days ago I mentioned the gourds and promised “more later”. Well, this is your “more”.
Last weekend I enjoyed sitting in the winter sun prepping some of the “choice” gourds for birdhouses. Last year I found the gourd-tastic website “Amish Gourds” ; he raises and sells gourds for birdhouses and crafts but he also provides a good basic tutorial for raising and curing your own. That’s pretty nice of him, it’s as if he’s saying “I’m in the gourd selling business, but here’s how you can do this yourself if you’re foolish enough to try.”
Following the instructions posted on his “Gourd tips and Information” page, I managed to get a few properly sanded (I dipped them in bleach/water solution a few weeks ago), drilled for hanging holes and ready for painting/sealing.
I came up with a temporary pvc gourd drying rack on Lizzie’s porch; you’ll note the raw gourds are of a dull finish and have significant molds/fungus/? stains on them.

Mrs cohutt suggested paint instead of the “natural” sealed look and the first compromise run was up and drying a hour or so later. Note that it was recommended light colors be used if painting birdhouse gourds due to the cooler inside temperatures vs what would occur with heat absorbing dark colors.

The Next day we had quite a gusty blow ahead of a line of thunderstorms and I came home after work to find this:

Fortunately, these things are structurally quite strong and apparently bounce like ping pong balls when knocked loose from their temporary wire tether. No harm was done; I did a better job securing both the pvc hanger and the gourds. The gourds are back up and no casualties were found among the group. I snapped the following shot this evening:

Pretty silly looking isn’t it? Maybe that’s why I like it.
They are ready for a second urethane coat; after that I will drill 3 drain holes in the bottom of each and cut appropriately sized “front doors” in each.
This year’s experiment may be loofah gourds or “bushel basket” gourds. (Yeah, I typed “loofah”. Look it up, apparently nobody is sure exactly how to spell it.)
Progress as measured in geological time
Between the demands of my chosen daytime career and adjusting to being uprooted from my “living quarters” by the renovation demolition, I won’t be posting evidence of any quantum leaps of progress today or this week.
While I can claim some progress in the my rush to beat spring, it is as wide and deep as a parking lot puddle. This really doesn’t translate into captivating blog posting; I feel like it is being tracked in geological time and need to complete some of the multiple sub-projects underway before offering any evidence up here.
You may have noticed the that header picture has changed; gourds are in fact transforming into birdhouses as planned (although I am afraid I’m running behind schedule). More on this later……
This past weekend we did manage to enjoy two substantial vegi-meals from the remnants of the winter garden; a gratuitous food sacrifice picture follows (cabbage, brocolli, chinese kale, brussel sprouts and chard).

More to follow once I can come up for air…
Garden vs Bathroom
This will be brief.
While the frequency of posts here may suggest otherwise, I have been taking advantage of the milder weather to finish the “boxwood garden rearrange thing” and generally prep for spring plantings. During my “free” time lately, I’ve been a slave to two masters: the race to get the garden ready for spring and the race to get 141 year old house ready for another renovation project.
A sneak peek on the BGRT progress:

And and our bedroom last night, after the first step into a 3 month hell (if we are lucky). Demolition starts tomorrow.
(Note: Sorry for the picture formatting taking it out of the margins)

Dead-o-winter garden ramblings
There isn’t really much to share this time of year.
But here you go anyway:
On average there would be only about 8 weeks until my last frost date here in North Georgia. I found the data below for my county on the extension service’s website; even though the “average” last frost date might be somewhere around April 15th the spread is wide (Mar 8 – April 25) in just the last 15 years.
2010 Mar 8 29.7
2009 Apr 8 28.5
2008 Apr 16 31.0
2007 Apr 10 31.2
2006 Mar 27 25.6
2005 Apr 25 31.4
2004 Mar 23 24.7
2003 Mar 31 26.6
2002 Mar 28 30.1
2001 Apr 19 31.0
2000 Apr 10 31.9
1999 Mar 28 31.3
1998 Mar 23 31.7
1997 Mar 17 29.7
1996 Apr 11 29.3
1995 Apr 2 30.7
1994 Apr 1 29.6
1993 Apr 23 30.4
Regardless, it is time to go into a full seed starting mode. Most of the cool weather spring crops should be started by now as well as the summer plants requiring the longest growing season (in my case peppers).
From the previous experiment I had a tray of chard and kailaan that was ready to move off the mat; can anyone guess which ones are the ruby chard?
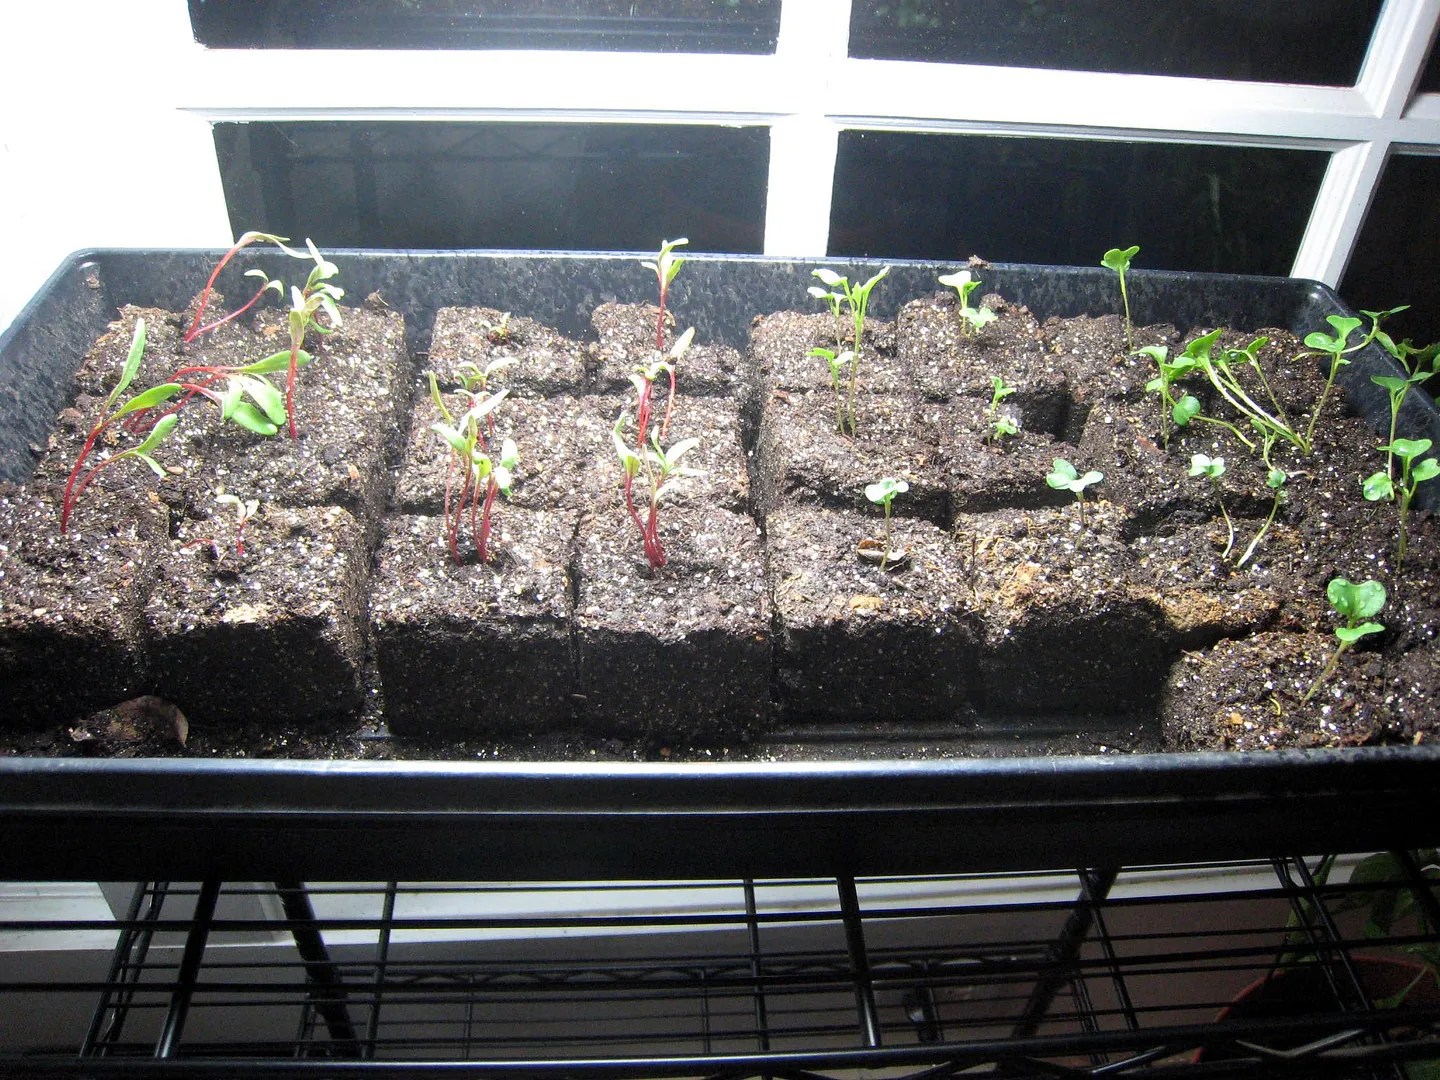
I stole a KMart mini wire shelving unit from where I kept my “network” equipment placed it under one of the lights so that all 3 shelves a sunny angle in front of the window. This will leave room for 4 trays on the mat per below:

In the two trays of soil cubes I have planted
raddachio
bok choy
broccoli
celery
“jalapeno gigante” peppers
poblano/ancho peppers
In the next couple of weeks I’ll make a couple trays of cubes to accommodate this year’s tomato scheme (2 x 32 should suffice lol).
Any day now a couple of experimental trays should arrive as well. They are 128 cell “Speedling” trays that look to me to be good for the “mass” plantings of greens I intend to put out in late march or early April : Rainbow chard, spinach, and lettuce.
Why all the greens?
Last weekend we craved fresh garden produce and I scavenged all the things I could come up with in this February state of a garden. The haul included the tailings of the broccoli side shoots, a smallish head of cauliflower, a small head of cabbage, a few ruby chard leaves, a couple of modest kailaan plants, maybe a dozen brussel sprouts and finally some leaves off the brussel sprout plants. I mixed with garlic and onion and stir fried it all in a makeshift broth that included some funky oyster sauce and spicy sweet & hot pepper sauce plus a little ginger and honey.
How was it?
Pretty decent for a garden scavenger dish; in fact it was delicious:

Always measure first.
The seed starting scheme this year was brilliant.
De-clutter the sun room, gain a more consistent temperature and perfect ambient and artificial light for my plants, utilize a space that is gathering dust. It would have been a great idea.
I was going to lay my new heat mat on the bottom of the old clawfoot tub upstairs, suspend my new lights immediately over it and load up 4 packed trays of seed starts in between.
The mat is too big
The trays are too long
The idea was too bad
Honey, it looks like it is the sun room again this year.
Sorry…

The first flat is planted – Broccoli and Kailaan (chinese kale) seeds are in the cubes on the mat…
Middle-o-winter Boxwood juggling
I’m gearing up for the spring seed starting run over the next few weeks- it will be a big jump from what I managed to do last year. Christmas brought me a couple of new high output CFL greenhouse lights and an upgraded “real” heat mat to aid in germination (thank you mother.) More on that later…….
In the meantime I’ve been trying to re-arrange what at one time was a formal boxwood garden. There are several reasons I needed to do this-
1. The garden was originally planted in 1934 and there have been many casualties over the years. Some sections were in good shape but others had damaged or missing bushes.
2. Sometime along the way, some of the more compact English boxwoods were replaced with common or “American” boxwoods. These are nice bushes but they created an unbalanced layout due to their different size and growth habit.
3. The original design was based on the assumption that the English boxwoods would be kept compact; the outside edge was actually a double row of bushes with a slate stone path in between. The problem is that 70 years of growth, even with slow growing English boxwoods, makes for large bushes and crowded conditions. I cut all of them back severely 20 years ago and it really didn’t take long for them to get too large again.
4. I wanted better utilization of the space- a nice area of sunny yard that was in between the two raised bed areas.
Last year I cut all of them back at least partially (the American ones completely) in anticipation of moving things around this winter.
The plan:
1. Remove all of the common boxwood from the garden.
2. Create a new border with them along my east property line (backs up to the neighbors “yards”.
3. Move the good interior English boxwoods to the outside border (in the spots vacated by the common and the spots that had lost bushes over recent years from drought, snow/ice & falling limb damage).
4. In the opened up interior, install more raised beds and/or berries or artichokes or ?
Some pictures of the progress:
From the back, the shorter bushes are the common that I cut back last year. The taller hollow backed bushes are English that I pruned partially last year to let some sun into the interior to stimulate new growth.

Looking to the east, I have moved some of the outside ring of common as evidenced by the holes (you can also see some of the reason why I want a better screen in the background).

Some of the first wave or relocated common in the section behind the garden:

Later, more spaces opened up as the common are moved:

The second wave of relocated bushes along the lawn in front of the garden (I realize they are planted closely and unimaginatively in a straight line. They are on 2 1/2 ft centers, roughly the same as in the garden. I’m just looking for a screen for now; There is room at either end of the light for some “adjustment” should I be so inspired later. .


Sidebar:
You can see the gourd army sunning on the pallet in the background; this reminds me that it is approaching time to turn some into birdhouses.
Another shot of the army:

It may not look like a lot but I can assure you it is HUGE progress; tomorrow I should be able to move some of the English and continue to open up the center while replacing the outer ring with healthier specimens.
It was hard work; I rewarded myself with the bowl of salad greens, radishes and broccoli shoots for dinner evidenced in the previous post.
EDIT:
The report above was written Saturday evening; Sunday I did manage to start on relocating some of the keeper English boxwoods. I moved 3 large ones, prepped several others and pre-dug several holes in the areas receiving new bushes.
One discovery that slowed me down:
Common boxwood roots are fairly shallow and there aren’t any super large “tap” roots like you would see under a fallen oak tree.
English boxwoods still have the dense shallow root mass immediately around the trunk, but…. they also have significant “tap roots” going straight down. In other words it took much more digging to free a bush from the ground, a larger, deeper hole to place the transplanted bush in and some creative manipulating to get the bush at the right depth with the hole completely filled in around the deep roots. SLOW moving compared to the dozen common ones I moved Saturday ….
Time out
Lately I’ve been digging big holes and moving boxwoods and digging big holes and moving boxwoods and just plain digging.
I put together a long rambling post trying to explain my plan and show proof of progress, but I’m too tired to proof it. It would make even less sense than my average post, so it is saved for later this week.
In the meantime, here are some shots of what is going on under my favorite poly hoop tunnel:
The spinach is liking it:

Some of the chard planted late last fall is slowly coming along:


Generally things looked good-

Good enough to eat. 😉

