Kitteh iz not tru


Bullet Garlic
(This will turn into a garden post. I promise.)
Bullet casting consists of melting a lead based alloy and casting into projectiles using custom molds selected by the caliber and intended application. In the “hand loading” or “reloading” process, the projectile or bullet is then loaded into a primed brass cartridge case that contains a carefully selected and weighed powder charge. The process is a blend of science and art; I find it an enjoyable extension of my shooting hobby vs being a chore. It provides the most accurate custom ammunition available for my specific guns at a fraction of the cost of commercial/factory loaded ammunition.
Last year when participating in a conversation in a reloading & casting forum, I offered to send a few samples to a fellow reloader to try out. Note: I did not offer loaded ammunition as the BATF and Dept of Treasury might take offense; I sent just a few cast bullets for him to load himself and decide whether he might want to invest in the same mold himself.
For the curious, I sent some of the bullets pictured below, 44 caliber 300g copper gas checked ones produced by a loaned RCBS mold. Seriously, who wouldn’t be tempted to try these works of art …..

A few months later in another forum, the same person saw some posts about my garden and remembered me as the person who had sent him the samples earlier. (A benefit of having a unique made up screen name; seriously, how many “cohutts” could there really be out here on the interweb? ) He contacted me and offered to send a few cloves of garlic for me to try in my garden. I hadn’t considered this before but graciously accepted the reciprocal offer after reading that even serial-plant-killing-garden-fools can grow garlic.
What he sent was a few cloves each of both the softneck and hardneck varieties he had been planting. He had forgotten the variety of each as they had been ordered a couple of seasons earlier; like most garlic growers, he saved some of the early summer harvest each year as seed stock (or clove stock I suppose) for planting the next fall and the specific names had long since faded from memory.
I planted the cloves last November and mulched with some fallen pecan leaves. A little green appeared before winter set in but I didn’t worry as garlic was purported to be pretty cold hardy. This turned out to be correct as we ended up having a pretty cold winter (for Georgia anyway) and the plants handled it well.
By early April a nice stand of garlic was leading the arrival of the main growing season:

This is the time that garlic really puts on the green and is the time to make sure the plants are well fed. Consider that these leaves are the solar panels that fuel bulb growth later in spring and early summer; more panels = more energy to the bulbs = larger potential bulbs = more garlic = a good thing. 😉
Later in the month, the plants had grown noticeably so I was optimistic about the ultimate harvest.

Next: What lies below
Bamboo & Beans
Or how to grow vertically
A friend owns a piece of property a couple blocks from here that has a stand of a fairly a large bamboo variety. One day I decided the stout bamboo would com in handy and received the owner’s permission to cut “as much as you want, please take it all”.
Once cut and trimmed accordingly, my first project was a bean trellis in a part of the yard that doesn’t get direct sun until almost noon. All of my other beds are aligned north/south or east/west in order to consistently plant the beds conscious of plant height and potential shadowing. After sending several months observing the sun’s track the sun and resulting shadows, I decided that the two “bean beds” should not be aligned with or perpendicular to the rest of the beds. Catty-wampous or womp-jawed or just “out of alignment” would work best according to my best aspergian visual calculations.
This would work only if my trellis was similarly out of alignment vertically; in June this wouldn’t matter as much as the sun is high. Later in the season, shading would be an issue since the sun doesn’t hit the beans until midday. To compensate for a lower sun and morning shade, I needed to tilt half of the 4 trellis panels somewhat to the north to allow for more afternoon sun to hit the other two.
I learned as I went and next time will lash the bamboo together differently – the trellis seems sturdy enough now but it took baling wire to get it that way.
The two beds are 2’x8’; I cut some 2” conduit pipe into short sections that could act as base sleeves for the bamboo. The “uprights” inserted into these were connected to “crossbars” that the trellis netting would be tied to. Basically picture two “W”s with the bases in the two beds, then connected at the tops and bottoms by cross sections of bamboo. Note the asymmetrical Ws:

Once netting was up (yes if you look closely you will see that I measured incorrectly and ran out of netting. DOH!) I came back and shored up the joints a bit with the baling wire and was ready to go.

A few weeks later, a shot of the back part of the yard from a ladder I was putting up (after much encouragement from Mrs C.)

I planted “Christmas” and “King of the Garden” limas; the Henderson bush limas were a hit past year and have returned this year. I added the runners for two reasons
1- Small footprint in the garden vs the harvest potential due to the vertical growth.
2- Continuous yield vs the flush harvest of the bush beans (“continuous” probably isn’t the best description, maybe “extended” is better?).
So how do they look today?
They have overrun the trellis:

In fact, so much so I extended the ends a bit with more twine and bamboo:


So far, so good. I’ll provide an update later in the season should this “bamboo and bean sail” survive the thunderstorms that is in its future.
Garden Squirrel Patrol
Living in a downtown neighborhood, I am fortunate in not having to contend with deer. However, I do have squirrel issues.
The issue with these tree rats hasn’t been their theft of anything I actually intended on harvesting. No, I should be so lucky. Instead they see my beds and (mistakenly) recall a hidden cache of bounty buried underneath them. The more fragile the seedlings or scarce the heirloom seed planted, the larger the imagined food stores seem to be.
Why is it I’ve never seen a withered young nettle or crabgrass sprout uprooted next to a rodent engineered core sampling? Likewise, if I finally get a couple of healthy nasturtiums sprouted or carefully transplant some New Zealand spinach, why do I awake to find what looks like the recent Guatemala City sink hole in their place.
The cats that own me would only run towards a squirrel if there was an open can of “9 Lives” behind it. Fail.

Cats aren’t employable; they work only if they deem it necessary for survival.
The solution?
A few months ago an unusual stray showed up on our doorstep. He wasn’t the one of the usual sad sweet mongrels that find their way into my neighborhood. Fortunately for this small pooch, we had an opening for a dog on the payroll.
Enter the tiny 6 lb stray toy poodle Albert.
Albert is eminently employable; he is like the annoying person at work who is always asking for more to do just to please the boss. He has worked his way up the chain to his current position “Supervisor, Border Security”.
As I plink away he remains vigilant; squirrels now mostly avoid the yard in favor of fence top circumnavigation.

Seed saving shame
I saved some seeds this week; the shame is how simple it was and how I haven’t been doing it under the assumption it was always complicated. In fact, the process favors people like me, who are so excited about the next stage of the garden that they forget about the patch that had peaked and faded. We really do intend to clean up after ourselves but step over the hideous yellowing plants bolting and flopping out of their assigned spot. We want to, we just never seem to do it in a timely fashion.
The good news is if you are really slack, like in the order of several weeks slack, you might find a pleasant surprise when you eventually get to it. A few leggy Bloomsdale spinach plants wintered over in one of the beds and weren’t really in the way. Over the last few weeks, they bolted to almost 3 feet tall then fell over on themselves and slowly expired. A couple days ago I finally decided to pull them and tidy up a bit, and was surprised at the number of fully developed seeds that were at every leaf and shoot off of the crunchy stalks.
I slipped a couple of sections of newspaper under the old stalks and cut them; I could hear seeds rattling off onto the paper. This is what the mess looked like

Closer you can see the seed clusters in better detail:

I spent a about 15 minutes stripping the seeds off of all the stalks and when all was said and done, I was left with about a cup and a half of seeds by volume. This is probably about 20 x the seed that I have planted since spring of last year, so I suppose I can claim I’ve saved enough money to justify a new garden hand tool of some sort.
This seems so easy- neglect, procrastinate, ignore, harvest
But is this seed viable, did I luck out and do it right?
According to the International Seed Saving Institute I may have.
They list spinach as one for “experienced” seed savers and offer a basic template for success.
Neither of the other two varieties made it to the seed stage this spring, so the recommended 5 mile isolation wasn’t violated. (Well, not in my plot anyway, but perhaps someone in my little city had another variety going to seed at the same time).
I know I had male flowering plants as well because I noticed that a couple of the floppy plants I pulled had wilted buds but no seeds.
My slackness lasted the requisite 4-6 weeks after the “normal” harvest time around here.
Whether or not you are interested in saving seed, you should take a look at some of the heirlooms available through Seed Savers Exchange. Spend a few minutes browsing the tomatoes, peppers and lettuce pages in their seed offerings; you won’t be disappointed. The active forum appears to have a lot of knowledgeable members (unlike what you find behind cohutt’s fence.) 😉
Kudzu vs gourds

I have been impressed by the speed at which these seedlings have turned into an army of tentacles.
So, which grows faster, Kudzu or gourds?
Kudzu grows a foot a day, in Indiana at least, or as far as this guy who wrote about it invading Indiana is concerned: http://www.lib.niu.edu/2000/oi000208.html
Gourd aficionado Laurie says that her vines grow up to 3 feet per day http://laurie1_2.tripod.com/mygourds/growgourds.htm, and since this is my blog, I choose to declare Laurie a genius expert and therefore gourd vines can outgrow Kudzu by a 3 to 1 margin.
I’m glad this is settled.
Staying true to my normal methods, I set up the rig previously described but only began to research gourds over the last couple of weeks once the vines came to life.
There are some interesting gourd-heads out there on the interweb who obviously really love growing them; one common denominator among them is that they offer a wide variety of tips often directly contradicting those of other gourd aficionados.
What did I learn from my modest gourd browsing efforts?
- Gourds flowers open in the evening and close again in the morning.
- Gourds are primarily water and are quite heavy on the vine, something that escaped me since all I have ever handled have already been dried.
- To avoid rot over the curing/drying period, 2-3” of stem left must be left on the cut gourd.
Things vary considerably outside of the basics listed above. For instance:
- Gourds have shallow roots / gourds have robust roots with significant tap roots.
- Night hawk moths are the primary pollinators and hand pollination is needed due to the delay in these moths’s arrival some seasons / beetles and bees pollinate gourds sufficiently to aid the moths.
- Gourd vines do not respond well to pruning to bring under control / gourd vines should be capped by cutting the main lead after 10 or 15 feet to induce female flowering.
- Gourds should be left on the vine to dry/gourds should be cut and brought in to dry
- Gourds should be trellised since pest and rot reduce yield if allowed to remain on the ground / yields are better if grown on the ground so they shouldn’t be trellised.
I found that Gourd Societies abound and most have pretty informative websites
Examples:
AGS: http://www.americangourdsociety.org/
NCGS: http://ncgourdsociety.org/
And the Alabama Gourd Society had a nice link page:
http://www.alabamagourdsociety.org/html/resources_links.html
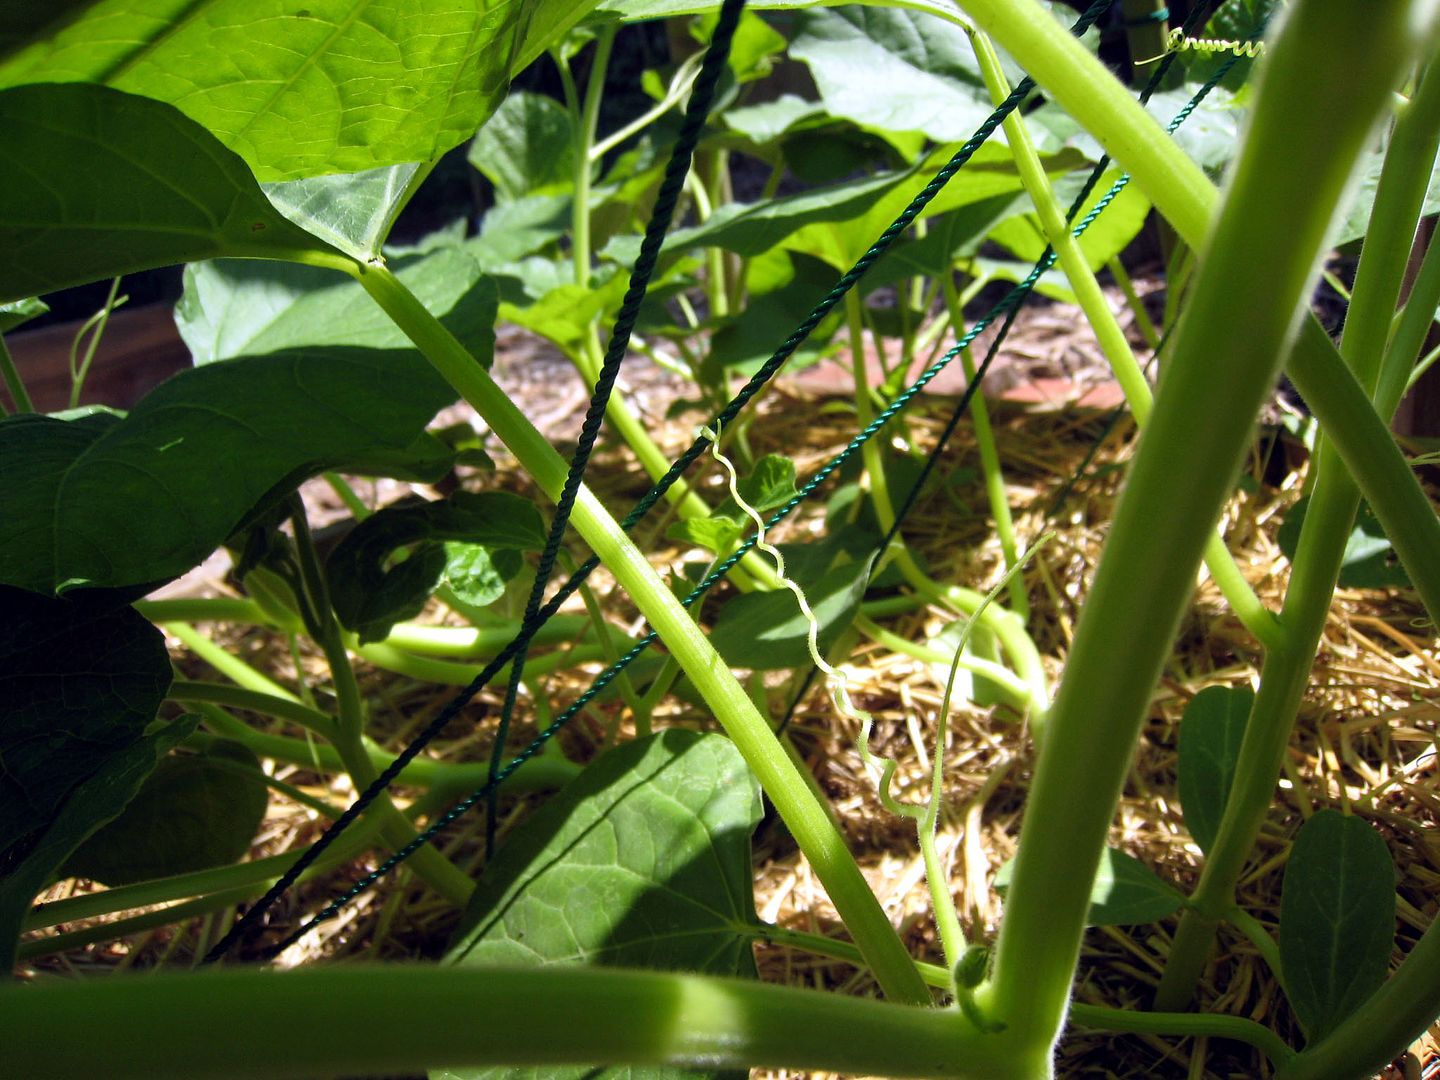
The one the vines get moving, they start reaching for anything and everything for a climbing anchor. Once the tentacle curls around whatever it can find, it turns into a spring that lifts the vines a bit and appears to provide some shock absorption to keep the little grabber from breaking off. This is my theory, and unlike Laurie above I don’t carry the credentials to declare it as internet fact.
The picture in the previous post was taken May 8th.
On the 23rd, the vines were gathering steam:

The pictures below were taken the same day and are an attempt to show some of the tentacles (I can’t seem to locate the real name for these) grabbing/coiling.


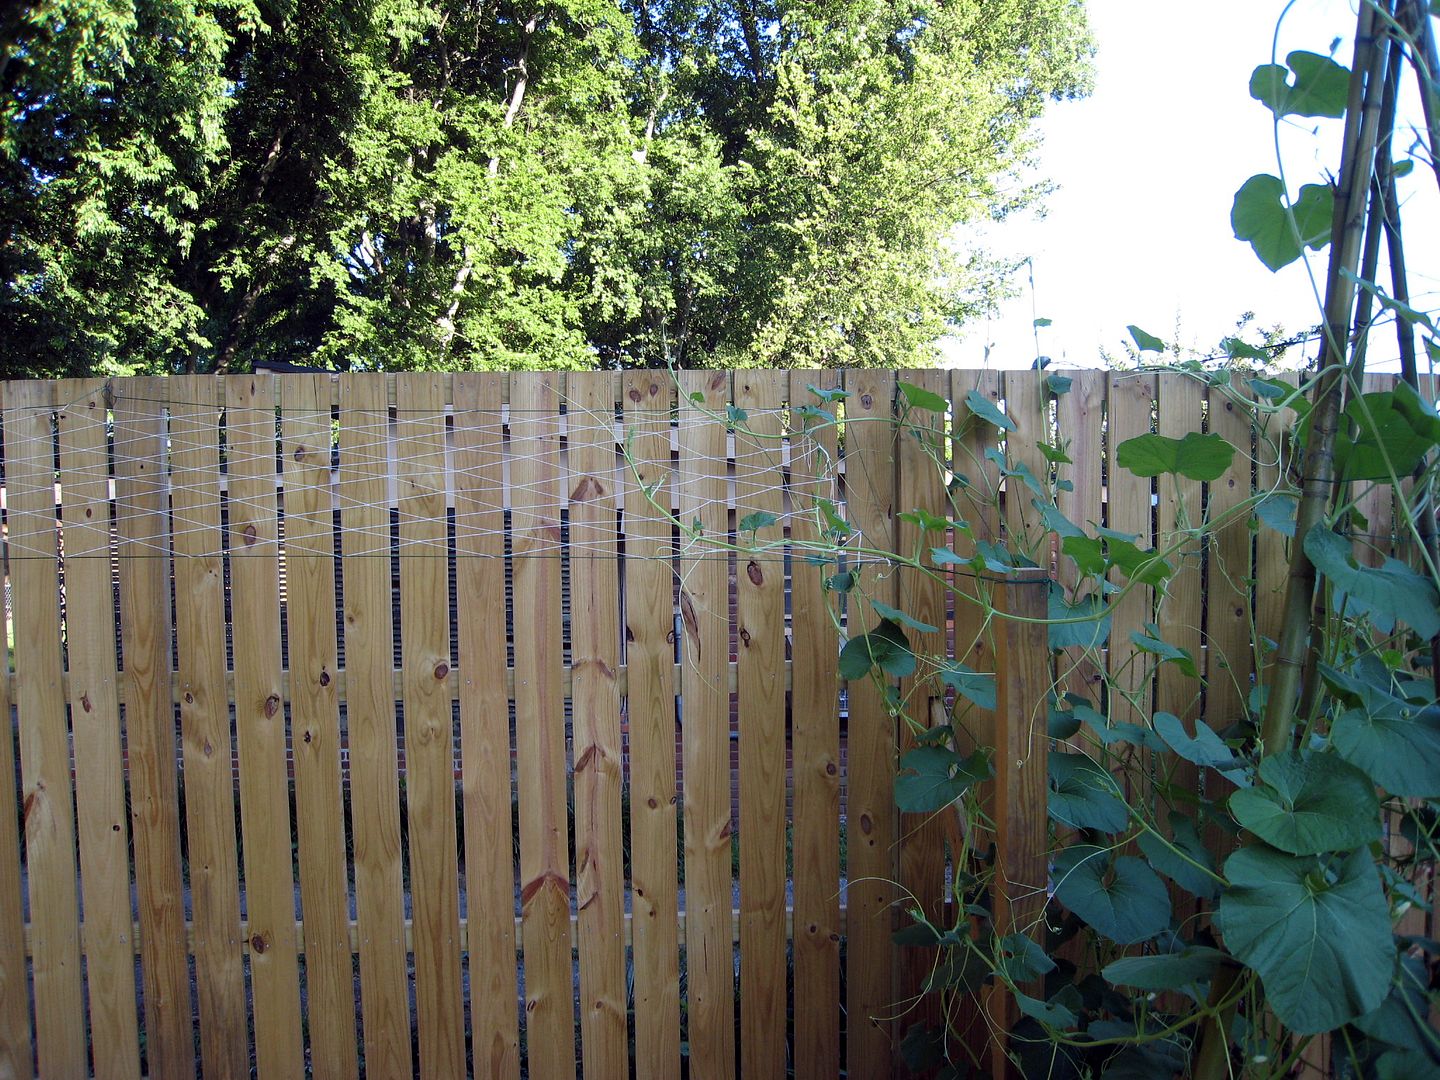
So where were the vines two weeks later (last weekend)?


A makeshift additional trellis was installed / designed (kind of in that order), but I’m now concerned that the weight of just one or two green 98%-water-on-the-vine gourds will collapse it without reinforcement. Ah, a project for a future evening….
Enough about gourds for today…….
Gourds. But why?
Months ago I became intrigued by the odd heirloom gourds I discovered while browsing the Seed Saver Exchange winter catalog. I was tempted to order the variety pack only because I was certain no one I knew had ever grown them. A quick review of the expanding garden template reminded me that my yard is only 65 feet wide and some of these vines grow to be that long. OK, so they weren’t suited for raised beds in tight spaces and I had already committed to Patty more variety of actually edible plantings than I had raised beds (at the time).
But I can justify anything if I put my mind to it.
Justification #1: We don’t want to use insecticides in the garden. Insecticides kill bugs. Bugs eat plants. Birds eat bugs. Therefore Birdhouse gourds would be justified as a worthy crop behind cohutt’s fence. Yes I know, a compromise vs the decorative gourds originally ogled in the SSE catalog.
Justification #2: I had slaved all winter to erect the back section of my fence; unfortunately it looked so tall and new, like the stockade fence on the old F-Troop tv series. Gourds grow quickly. Check. Gourd vines can grow in excess of 60 feet long. Check. Gourd vines aren’t permanent and something else can be done next season. Check. I had an excess inventory of 18′ bamboo poles from which gourd trellis yard art can spring. Check
So…. I built a raised bed out of the last of my 2×12 lumber; actually it was more like a raised box, measuring only 30″ square. I excavated out a 6″ basement for this box and filled it with composted dairy cow manure before topping it with Mel’s mix.
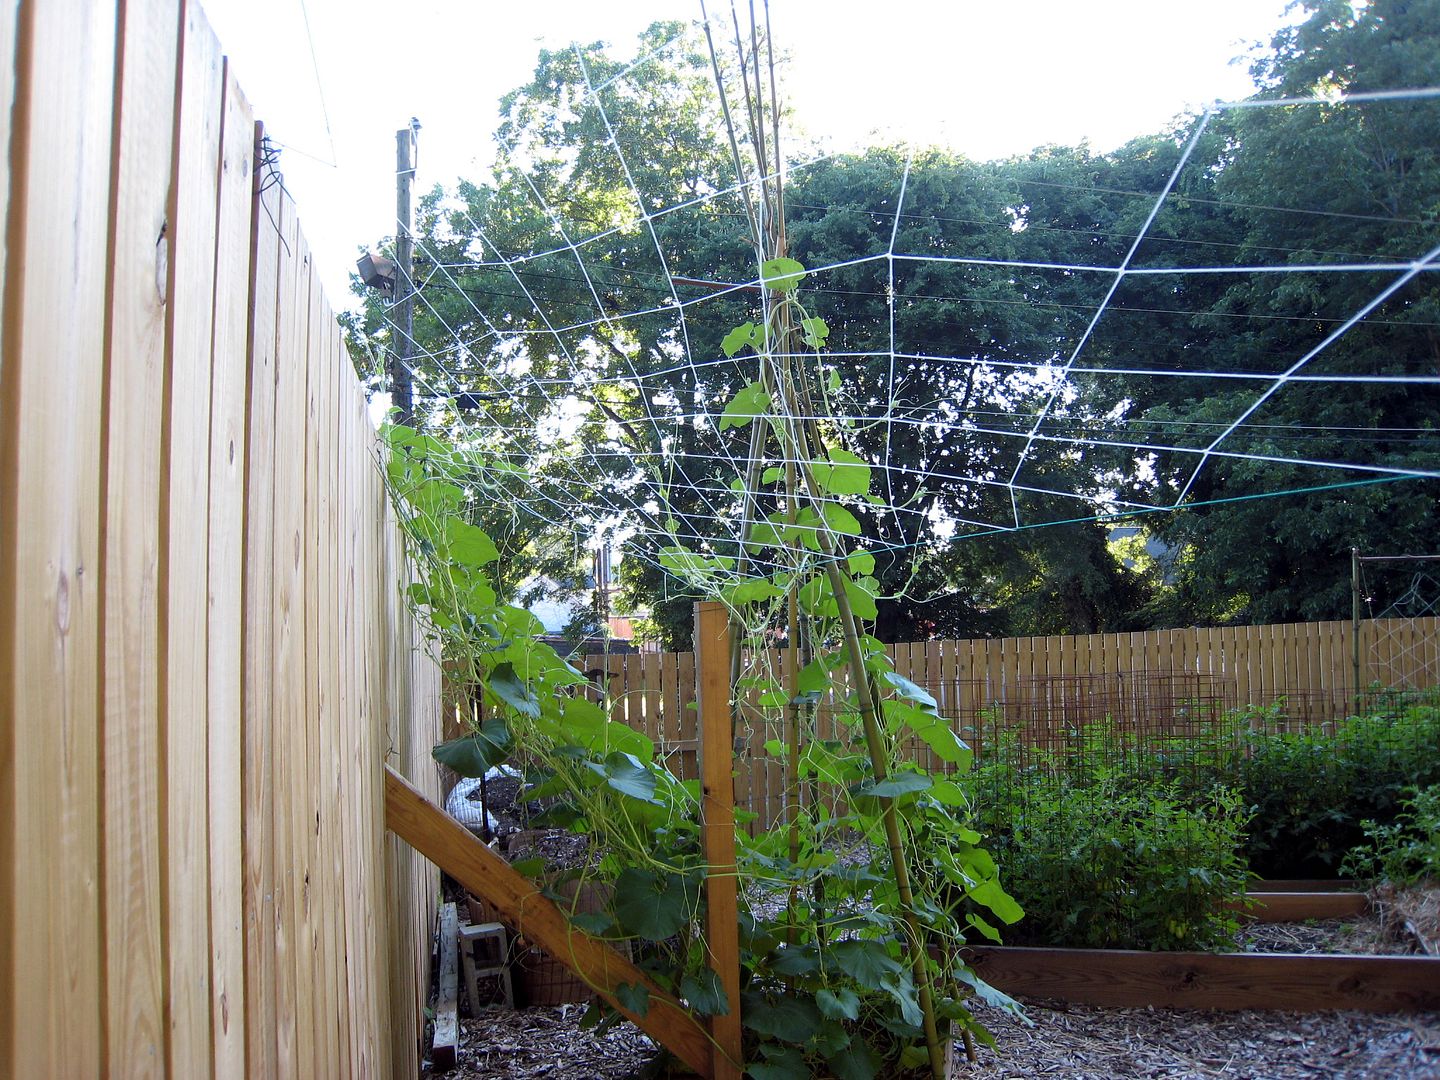
After planting a dozen or so seeds in this box/bed in late April, a hideously beautiful bamboo teepee frame was erected over the box. A few pieces of 300 lb green garden twine were tied so that it radiated from a piece of rusty re-bar wired to the box out to the top of the fence.
The box. Note that this is anchored via a steel stake so that the teepee might also be anchored. The unanchored bamboo blew down while I was setting it up. (In case there is any doubt: An 18′ bamboo teepee frame gets your attention when it jumps you from behind while you are blissfully surveying the garden listening to a podcast.)

The now securely anchored bamboo teepee:

The spouts doing their thing at the twine terminal base….

The sprouts
Next- gourd kudzu and spur of the moment trellis
Behind the fence
As you can see in the before and after pictures previously posted, several trees were removed for sun exposure (and because I was tired of the junk trees that had crept into and over my yard over the last 20 years). I hired most of the tree work out but did the rest myself, including pulling the privet hedge manually, one nasty tap root at a time. Welded wire and barbed wire fencing had become one with the privet so it was slow going at best.
In place of the wire/privet barrier, I erected the dandy new looking wooden fence in 3 sectional projects, each approximately 60 feet in length.
Details of this project from hell will follow one day; the point of this is to provide some framework for the lay of the land “behind cohutt’s fence”.
The picture is my best effort at this using Visio.

The house is just to the left of the layout; the fence runs along the bottom and right borders.
“Lizzie’s” is the old servants quarters outbuilding that I modernized to serve as a teenagers’ isolation cell. The bushes across the middle are the remnants of an old English boxwood garden with an inverted bell birdbath in the center. Everything that looks like a box is a raised bed of some sort, all installed since may of 2009 and each filled with “Mel’s Mix”.
Hopefully this provides a reasonable frame of reference for anyone remotely curious about any of the forthcoming posts.
Ready, Fire, Aim
A little over a year ago, I decided to rip up a 20’x20′ section of lush zoysia sod and install a modest raised bed plot where I might grow a vegetable or two.
Ha.
We live in Northwest Georgia in a downtown “National Register Historic District” neighborhood surrounded by encroaching commercial and office zones. Our crooked little home was constructed on our 65 ft wide lot in 1869 or 1870 by the deacons of the Presbyterian church.
We’d been in this home since the autumn of 1987 and in most years since I had declared that this year would be “the year of the yard” at some point between winter and spring. Higher priority projects always bumped any hope of yard progress into the future so I spent the last 20 odd years teaching myself the “trades” useful to bring a 100+ year old house up to my lovely spouse’s code . Participation in the lives of my two wonderful children also managed to keep yard projects at bay (other than building playhouses and jungle jims and the like…) I suppose I could have hired out some services along the way and paid professionals to transform my yard, but as my spouse says, I have the rarely endearing quality of thinking I can do way to much myself (and frankly I’m too cheap.)
Little did I know that “The year of yard” was upon me in late May 2009 when I rented the sod cutter…..
Disclaimer: For anyone who reads any of the subsequent posts in this blog:
I do things my way even if different from the “right” way.
I prepare to learn by studying then actually learn by “doing and screwing” aka “hands on”, “learning by my mistakes”, “the school of hard knocks”, etc etc etc
Should my mother ever find this blog she will probably be appalled by my spelling and grammar.
Through the back window on May 24, 2009

Same, June 6, about 20 minutes ago:

